![Locable Logo 3a3a3a Gray.png]](https://help.locable.com/hs-fs/hubfs/Locable%20Logo%203a3a3a%20Gray.png?height=50&name=Locable%20Logo%203a3a3a%20Gray.png)
Available for the Build, Grow & Coordinate plans on the Locable Marketing Platform
No matter how a new member joins, whether through your website, by mailing in a paper application with a check, or another method, you’ll need to add them to your Locable account so they can:
- Be displayed on your website and included in member cross-promotions
- Have their membership invoices automated for recurring fees
Ideally, you will have new members apply directly through the membership application form on your website. The steps outlined in this help article use that approach as the example, but will also reference instructions if you have a manual application submitted.
Step 1: View the Form Submission details
Once a new membership application form is submitted on your website, you can access that data by clicking Activity Hub > Form Submissions.

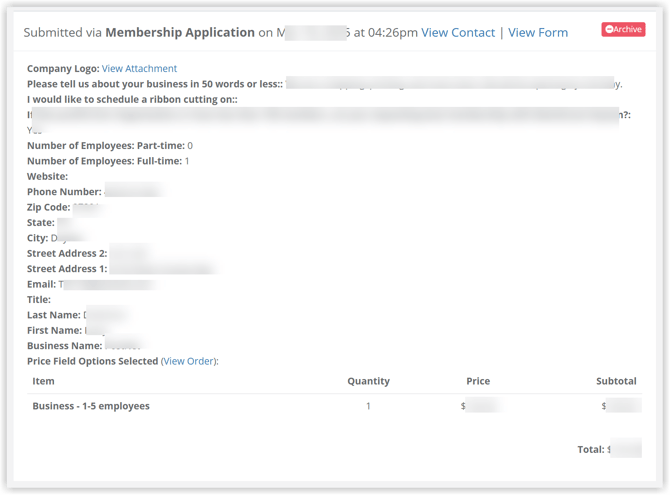
From here, you will click to 'Read' the new Membership Application form submission data:

The form submission data will show all of the details submitted for the various fields you've included in your Membership Application, for example:
Step 2: View the Contact Record
Click to view the Contact record created or updated by the form submission.
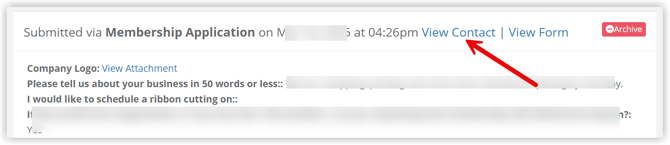
Pro Tip: Open the contact record in a new tab, keeping the form submission open so you can reference it as you set everything up for the new member.
OR Manually Add the Contact to your CRM
If your new member manually applied for membership (paper form, for example), you will need to be sure the contact details for your new member are in your CRM.
Start by searching your CRM for the contact's email address. Type in a portion of the Contact's email in the search bar and see if they are already in your CRM.
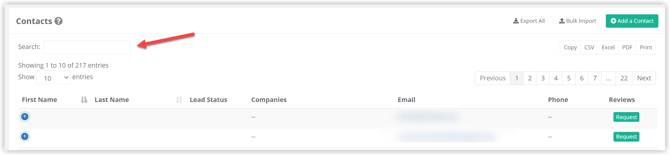
If the email already exists in your CRM, open the contact record by clicking on the contact name and then make sure all of the details in your CRM match the details in their membership application.
If the contact's email does not exist in your CRM, click 'Add a Contact' to add the contact to your CRM. See more about adding to your CRM here.
Once your contact is saved in your CRM, you will want to add your contact to any Member-related or otherwise appropriate Contact lists, if you have created those for use with sending Express Email Newsletters. For example:

Click 'Save Changes' to update the Contact record.
Then, you also want to make sure the contact record is associated with the company in your CRM. To do this, scroll to the bottom of the contact record and type in the company name here:

Be sure to click 'Update' once you've selected the appropriate company.
NOTE: A Contact may be associated with multiple companies, if appropriate.
If the company name is not in the CRM, you will need to add the company by following the instructions in the next step.
Step 3: Add the Company to your CRM
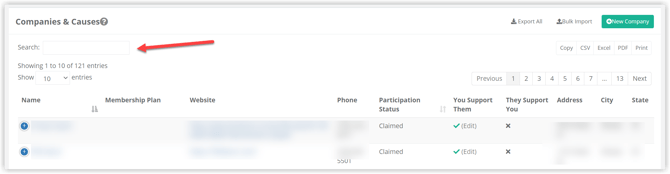
If your new member is a business, you will need to be sure that the business is in your CRM. Start by searching your CRM for the business name. Type in a portion of the Company name in the search bar and see if they are already in your CRM.
NOTE: You may want to check a single word in the company name to be sure you don't have it set up differently in your CRM compared to how it was submitted on the form.
If the company already exists in your CRM, open the company record by clicking on the company name and then make sure all of the details in your CRM match the details in their membership application.
If the company does not exist in your CRM, click 'New Company' to add the company to your CRM. See more about adding to your CRM here.
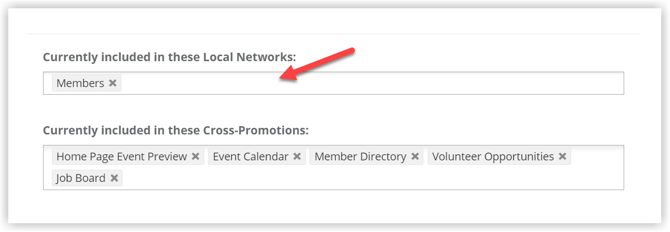
Adding the Company to Local Networks
Be sure to add the new member company to any appropriate Local Networks you have created in your account so the company will appear on your website and be included in any member cross-promotions.
For example, if you have a 'Members' Local Network, you will want to add them so they can appear on your website anywhere you are cross-promoting your members.
Make sure you click 'Save Company Detail Changes' once you've completed your input.
Step 4: Add the Membership Record
Once you have confirmed that all of the member details are added to your CRM, and your member is now appearing on your website, you will need to add their Membership to your account to set up invoice automation.
This can be done by clicking Add Membership in the Company Record (for a company membership) or the Contact Record (for an individual membership).
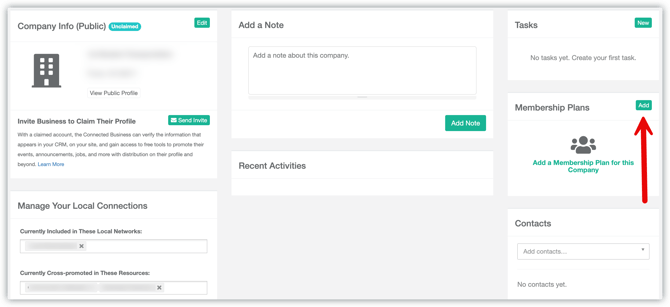
Alternatively, you can add a membership by going into CRM > Membership.
You can walk through adding memberships here.
Step 5: Invite your New Member to Claim their Locable Account
Once you have set up your new member in your Locable account, if it is a business membership, you will want to invite them to claim their free Locable account.
To do this, open the company record and click the 'Invite' link in the CRM. You will see the 'Invite' link in the Contact record and in the Company record in the CRM if your new member has not already claimed their free Locable business profile account. This will allow you to send them a personalized invitation to claim their account and begin participating in the various cross-promotion tools offered through Locable.
NOTE: If you have an associated contact, it's best to click the invite link next to the associated contact so your invitation is more personalized.
Once you have sent an Invitation to the company or the associated contact, the participation status will update to 'Pending Invites'.
![]()