![Locable Logo 3a3a3a Gray.png]](https://help.locable.com/hs-fs/hubfs/Locable%20Logo%203a3a3a%20Gray.png?height=50&name=Locable%20Logo%203a3a3a%20Gray.png)
Available for the Coordinate plan on the Locable Marketing Platform
Managing memberships doesn’t have to be complicated. Our Membership Management tools build on our integrated CRM with automated billing, recurring payments, and invoicing, so you can spend less time chasing payments and more time serving your members.
Membership Settings
Before automating the invoicing of your memberships, you’ll need to define your Membership Settings and create your Membership Plans.
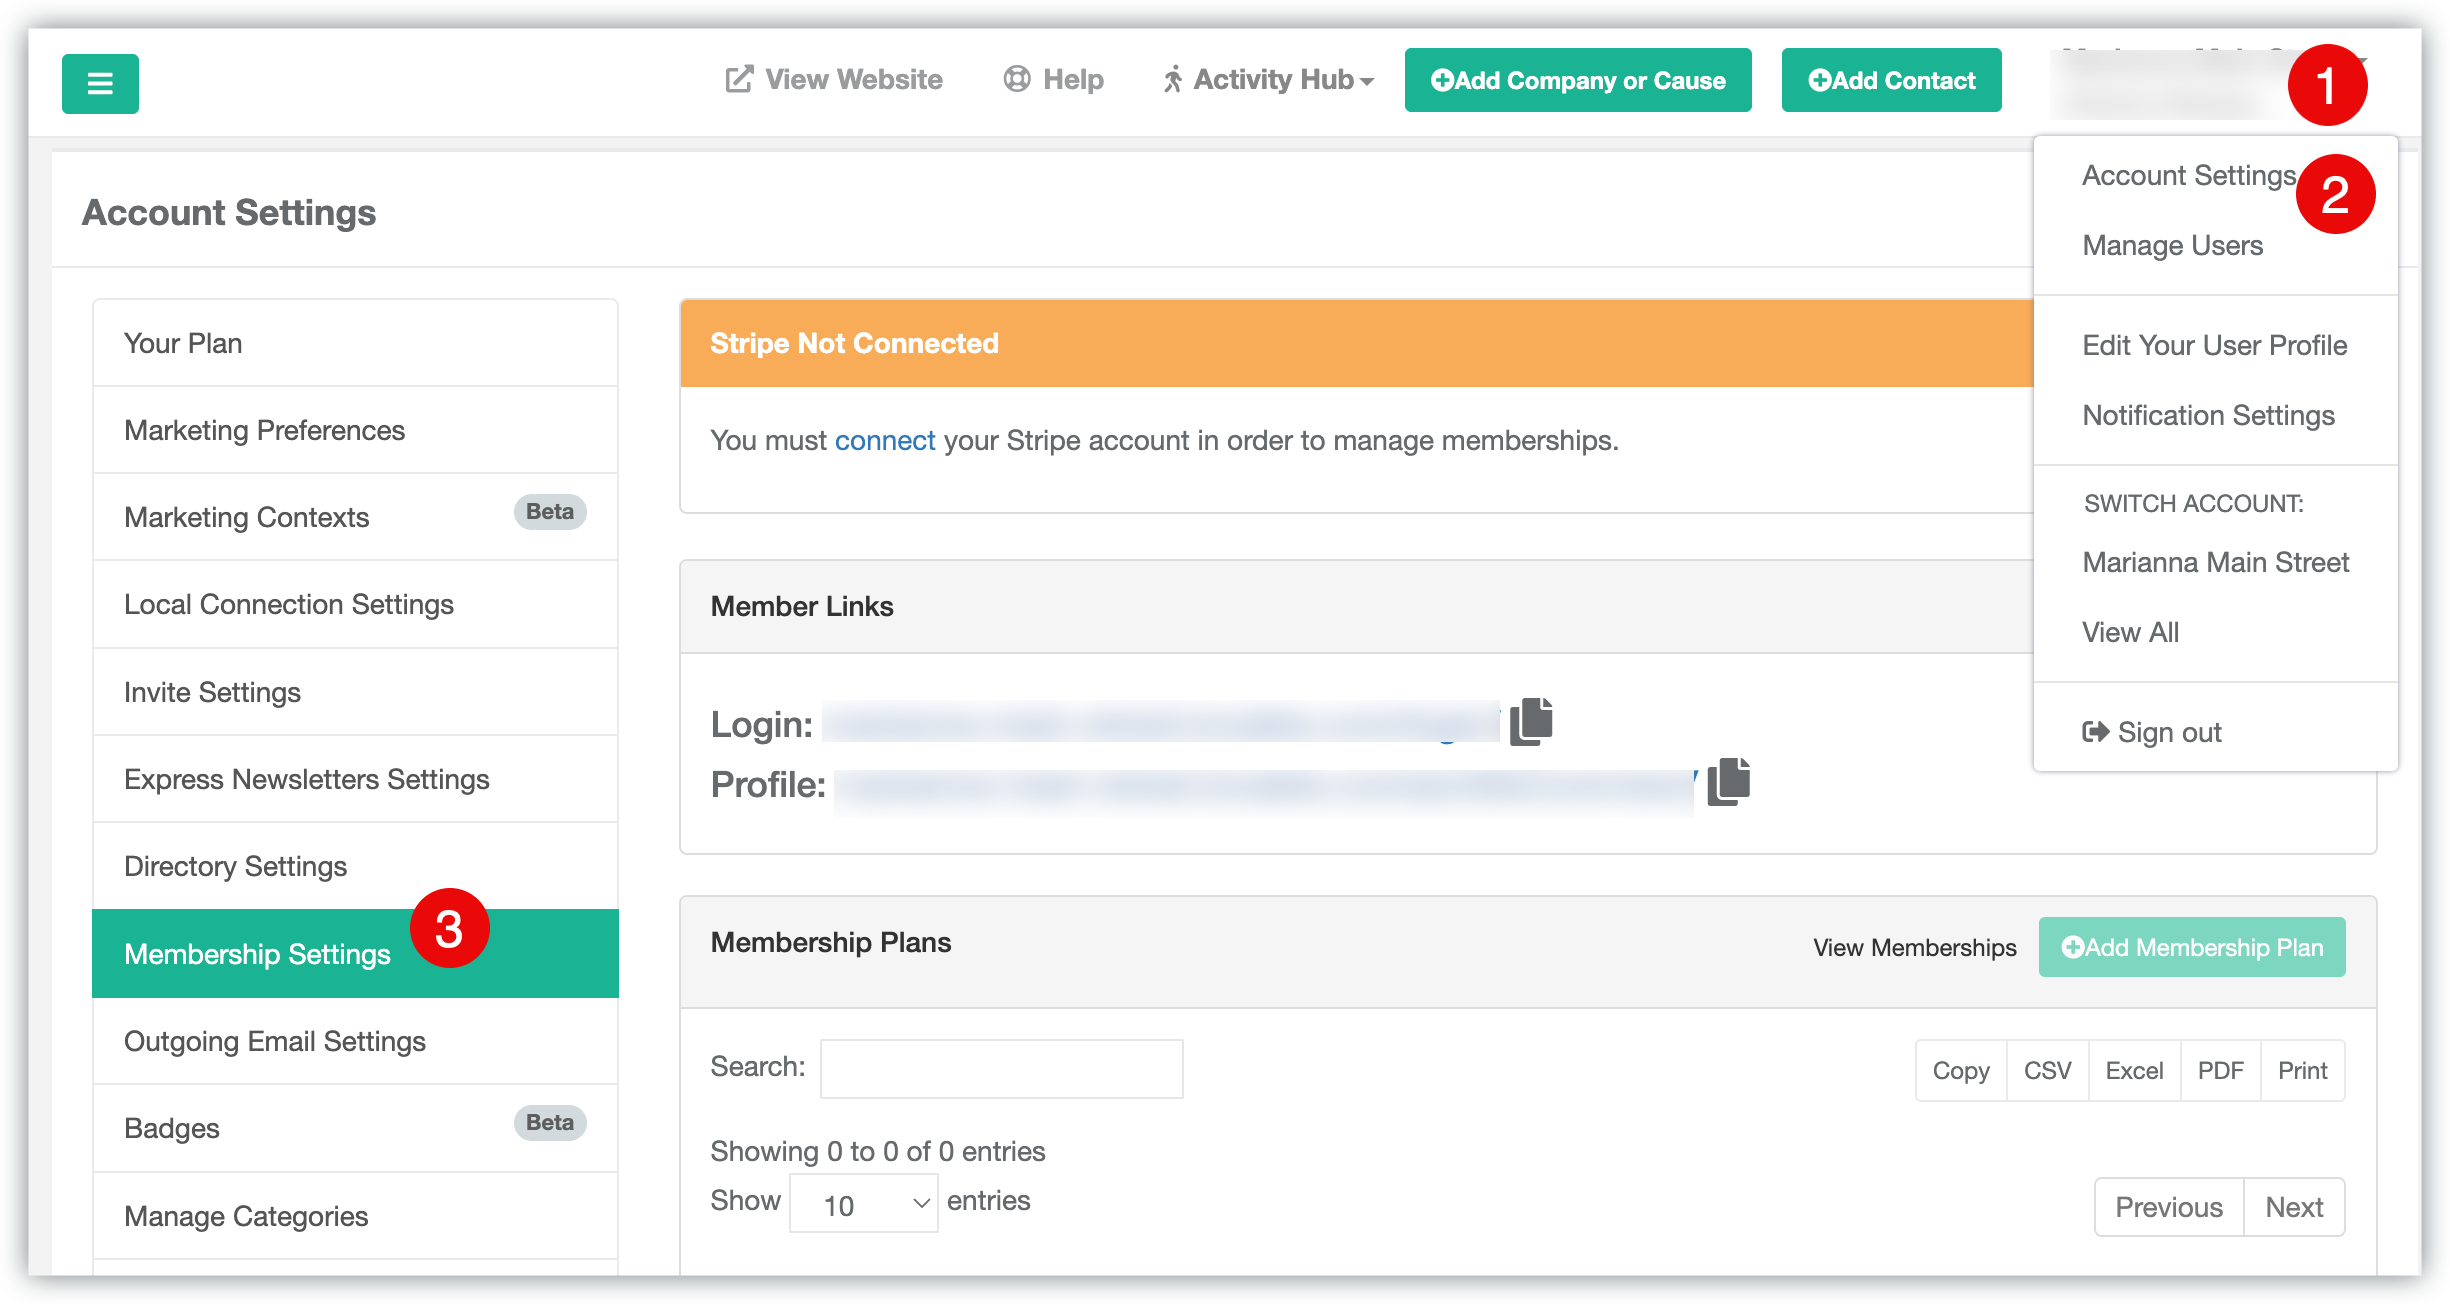
To get started, navigate to Account Settings > Membership Settings via the menu in the upper-right corner of your Locable account to define your membership options and customize your plans to fit your organization’s needs.
-
Click on your company name in the upper right-hand corner of your account
-
Click on Account Settings
-
Open the Membership Settings
Your Membership Settings are broken into several parts:
Stripe Connection
Make sure your Stripe account is linked to your Locable account. If you are seeing this message, your account is not connected.

The Stripe connection is required for membership invoicing.
Member Links

The Login link can be shared with your Members, giving them the ability to create their login credentials for your Member Profile Portal. The Member Profile Portal allows members to manage their membership plan, update their business information, and post events, offers, and announcements.
This link can also be added to the navigation on your website if you like. This can be done by going to Website > Navigation Menus and clicking 'Add Member Login Buttons' in either the header or footer menu.

This offers your Members a quick link to the Member Profile Portal right on your website. Once they are logged in, they can quickly access their Member Profile and make updates as needed. You can learn more about the Member Profile Portal here.
NOTE: The login for the Member Profile Portal requires a Website or Microsite powered by Locable. This is also strongly recommended as it optimizes the functionality of other tools within the Coordinate Plan, such as the Community Calendar, Directory, Job Board, and many others.
Membership Plans
In order to begin adding your Memberships to your account, you first need to Define your active Membership Plans. To do this, you would need to click 'Add Membership Plan'.
NOTE: This button will be deactivated until your Stripe account is linked to your account.

Learn more about Managing Membership Plans here.
Membership Resources

You have the option to include Membership Resources that are exclusively accessible to members upon logging into the Membership Profile section of your website.
Learn more about Membership Resources here.
Membership Settings
You may adjust the default settings for Memberships to suit the needs of your organization.

-
Define how soon before the renewal date an invoice is sent via email to the billing contact
-
Set your invoice due date. This defaults to the renewal date, however, you can choose to offer a due date past the renewal date, if you prefer.
-
Should a member not pay their fees by the due date, you have the option to have the system automatically deactivate the membership in a specific number of days.
-
Convert Member Profile - if selected, when the member logs into the Member Profile, if they have not yet claimed their free Locable account, we will prompt them to do so. This will allow them to manage their business details.
-
Show Locable Marketing Resources - if selected we will display links in the Member Profile area. When the member logs in they will have access to these resources.
-
Referral Discount Code - if you have a referral discount code from Locable, you can add it here to allow your members to accept that offer.
Setting Up a New Member in Membership Management
When your organization uses Locable’s Membership Management tools, setting up a new member involves a few separate but related steps.
These are outlined step-by-step by going through How to Set Up a New Member, but here's a basic overview:
1. Add the Member to Your CRM and Local Networks
This step ensures the member is:
-
Added to your website
-
Displayed in all member-related areas
-
Included wherever members are promoted (like directories, maps, etc.)
⚠️ This is not connected to invoicing or billing.
2. Create the Membership Record (to enable Invoicing)
In the CRM > Membership section:
-
Click “Add Membership” to create a membership record.
-
This enables automated invoicing for renewals.
-
Only active members will receive invoices.
-
Deactivating a membership stops invoicing.
⚠️ This is separate from adding them to the website or giving them login access.
3. Invite Them to Claim Their Locable Business Profile [Encouraged but Optional]
Once the membership is set up, you can:
-
Invite the member to claim their free Locable Business Profile
-
This lets them:
-
Update their business info
-
Post events, jobs, offers, and more
-
Appear across the wider Local Connections Network
-
📌 This is like setting up a Facebook or Google account—it’s not tied to logging into your website directly.
4. Member Login for Your Website [Optional]
If you have chosen to add a Member Login option on your website, and a member wants to view or manage their membership details on your website:
-
They need to sign up and create a password using the email address on their membership record.
-
Once logged in, they can:
-
View their billing history
-
Update their member info (if allowed)
-
Manage other membership-related settings
-
🔐 This is more like logging into a bank account to view personal information—totally optional.
For more information, be sure to watch the recorded 28-minute Membership Management webinar.