![Locable Logo 3a3a3a Gray.png]](https://help.locable.com/hs-fs/hubfs/Locable%20Logo%203a3a3a%20Gray.png?height=50&name=Locable%20Logo%203a3a3a%20Gray.png)
Available for all paid plans on the Locable Marketing Platform
You're ready to start sending your Email newsletters using Express and your account is fully set up i.e. you confirmed your domain and you set your defaults.
Express is built to follow the Marketing 3-4-5™ Content Distribution approach where content lives on your website and you distribute it out via email (as well as to social media, through Local Connections™, etc).
You can send quick messages without selecting content but most of your newsletters should include blog posts (articles) and events. You can also include content from your Local Connections™ to amplify their efforts.
Explore this 30-minute recorded webinar to avoid common email marketing mistakes and get a walk-through of setting up and using Express to streamline sending emails for your business or organization.
Using Express Email Newsletters
This feature comes packed with functionalities designed to maximize efficiency. With the initial setup complete, you can expect to send out email newsletters in less than five minutes.
You begin creating your newsletter by clicking Express Emails > New Newsletter in the navigation bar on the left.

Then follow the steps to define the basic information for your newsletter.

- Give it a Campaign Name - This is private to you and useful for staying organized or reviewing past email campaigns. Including a date can be helpful as a skip reference.
-
Your Subject Line is what people see in their inbox. It's important. It should be compelling, but not too long or too short.
-
Summary - This is the introduction to your email. Use it as a preview or add custom messages, hyperlinks, and other material that doesn't currently appear on your website as a blog post or event, for example.
NOTE: The text editor does not support pasting images into the Summary area. This is an area for text only.
Select which content to include
Once you've completed the introduction to the newsletter, click 'Continue' and begin to select any content you would like to include in the newsletter.

In the left column, you'll see all Available Content that can be added to your newsletter by clicking the "+". By default, this column shows your content and your Local Connections™.
- You can filter the available content by doing a keyword search, searching for a specific business to view their content, or searching by a Local Network. You can also choose to view only your content by clicking the checkbox. Once your filter options are chosen, click 'Search'.
- You can choose the type of content including Events, Blogs, Jobs/Volunteer Opportunities, and Offers
- As you add content, you'll see the Selected Content column grow.
NOTE: Blog posts will display the most recently posted content first. Events will display the soonest event first.
Selected content will be displayed in your newsletter in this order:
- Events
- Blog posts
- Jobs/Volunteer Opportunities
- Offers
Featured Content
One piece of selected content can be featured by clicking the star icon. The featured content will appear as the very first piece of content in the newsletter.

The rest of the newsletter will be organized and grouped as previously noted.
Previewing your Newsletter
Once you've selected your content and clicked 'Continue', you can review the preview of the newsletter before sending or scheduling your email.

The Preview is a near approximation of the email so you can review how things appear. If necessary you can go back and edit any portion of the newsletter by clicking the Edit links above the preview.
Pro Tip: We recommend that you Send a Test Email using the button at the top right of this page, which will send it to your email address for review in a real email client before you send it to your chosen Contact List.
Sending your Newsletter
Once you are satisfied with your newsletter preview, you will need to choose an audience, or select your recipients!
On the preview page, you can select from your list of Contact Lists or choose to send the newsletter to 'All Subscribers'.
You can also schedule the email to be sent in the future. If you leave this space blank it will be sent immediately.
Click the Green button to complete and send the newsletter. You will receive a confirmation email once the newsletter is sent (either immediately or based on the date it was scheduled).
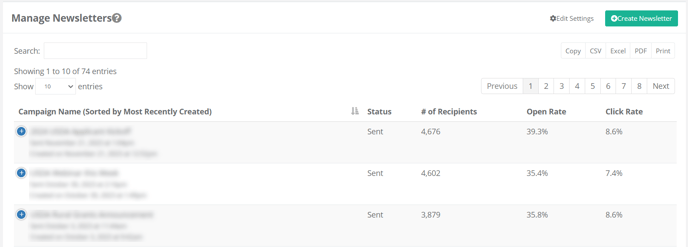
Once your email is sent to your identified audience, you'll start seeing open and click rate information by going to Express Emails > Manage Newsletters.