Customize the look of your Express Email Newsletter in a few easy steps
Available for the Build, Grow & Coordinate plans on the Locable Marketing Platform
Before you can start sending Express Email Newsletters, there are a couple of things you must do in your account.
After you set up your domain to send emails, you'll need to define the settings for your newsletter - customize what it looks like for your audience. You'll also want to set up Contact Lists and add Subscribers so you can start sending them your newsletters.
Define your Express Newsletter Settings
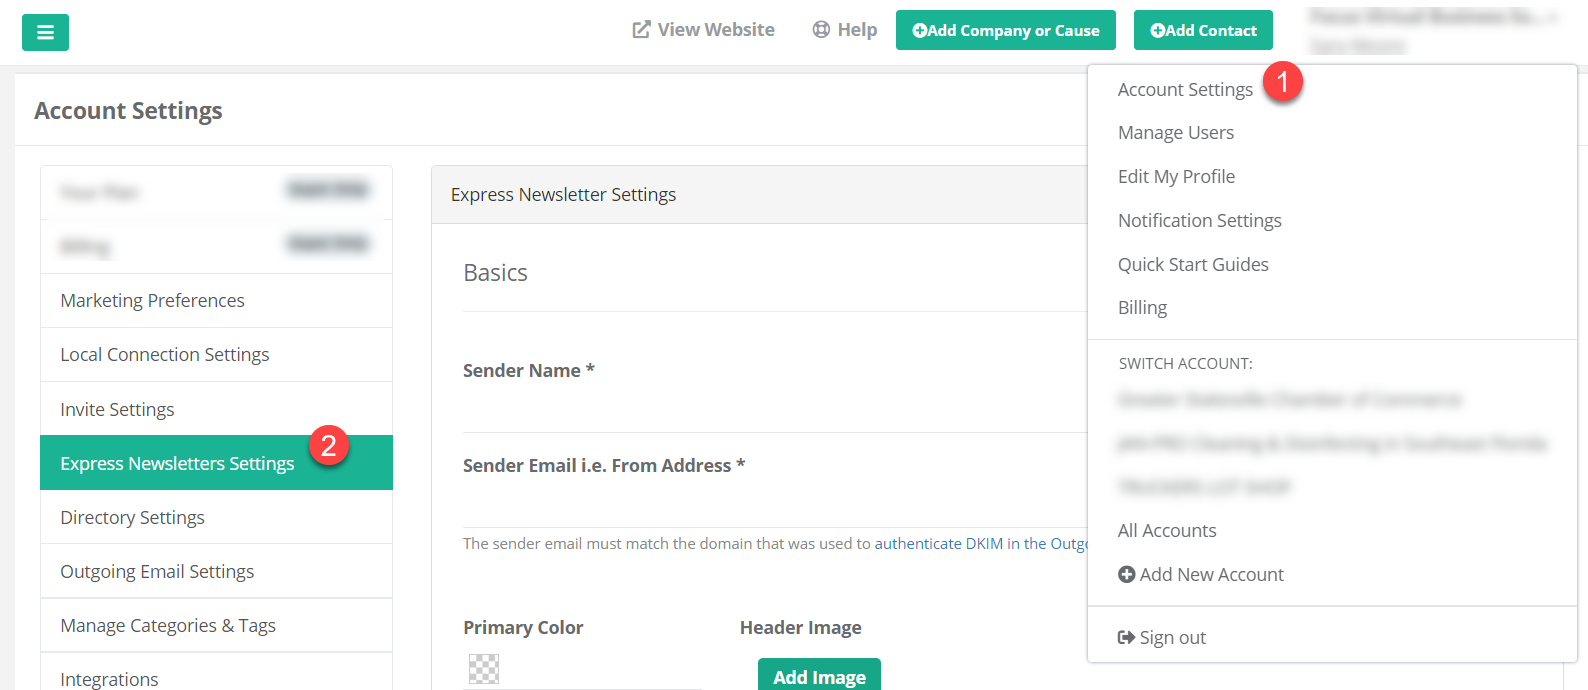
To get started, log in to your Locable account and click on your name in the upper right-hand corner. Select Account Settings (1) and then go to Express Newsletter Settings (2).

Now you can define the settings for your Newsletter.
Basics

-
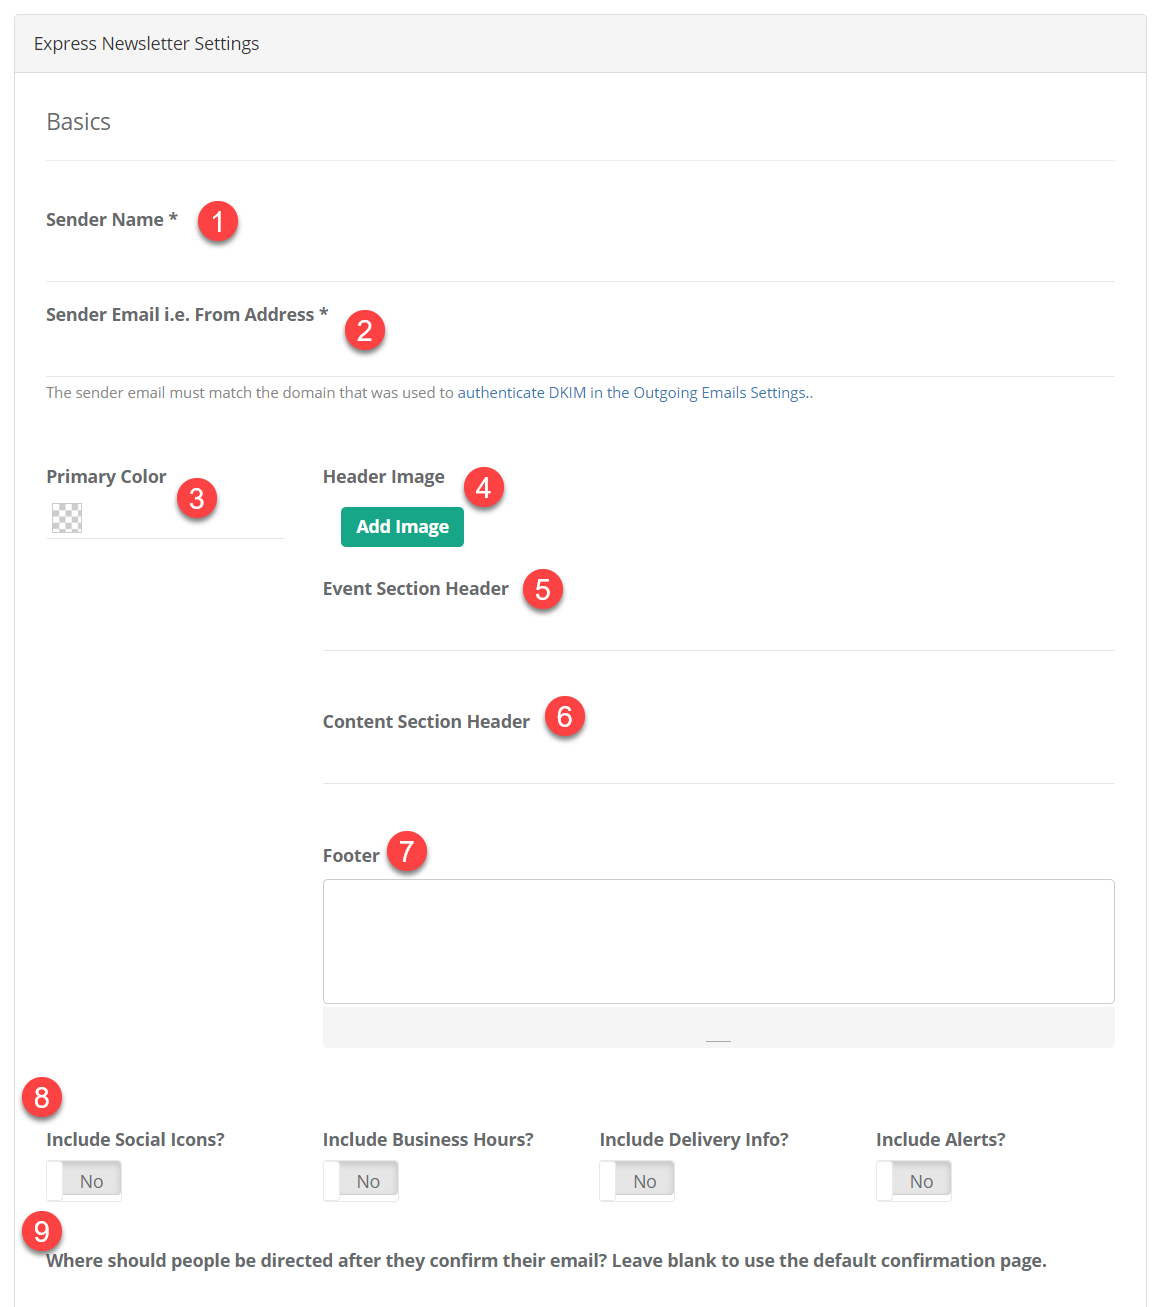
Sender Name: Add the name that will appear as the sender of the email. Naming a real person instead of your business name, support, marketing, etc., will increase the odds that people will open your emails.
-
Sender Email: Here you will enter the branded email address that the Express Email Newsletter will be sent from (this should be the full email address - xyz@domainname.com.) NOTE: the domain must match the one you verified in the Outgoing Email Settings.
-
Primary Color: This will act as a border/background color for your email.
-
Header Image: This is generally a logo or similar image that will appear at the top of your emails.
-
Events Section Header: This is the 'section title' that will appear in the newsletter before all of the event posts you share in the newsletter. This makes the email more scalable and differentiates events from other content more fully.
-
Content Section Header: This is the 'section title' that will appear in the newsletter before all of the blog posts you share in the newsletter.
-
Footer: Here you can define any particular text detail that you would like to appear in the footer of your newsletter.
-
This area enables your emails to automatically include information from your Locable account toward the bottom of all emails: your social media icons, your hours of operation, your delivery area (if applicable), and your current business status alert (if applicable - this was originally added as a COVID status and may be used in any unique circumstances).
-
Where should people be directed after they confirm their email? This is an optional field and refers to what should happen after someone opts into your newsletter through one of your Locable forms. It is blank by default and uses an automatically generated confirmation from Locable. However, you may wish to redirect to a custom page on your website to include custom messaging, a download, a coupon, or something else.
NOTE: This doesn't apply to subscribers that you import or add manually without an email confirmation.
Contact Info
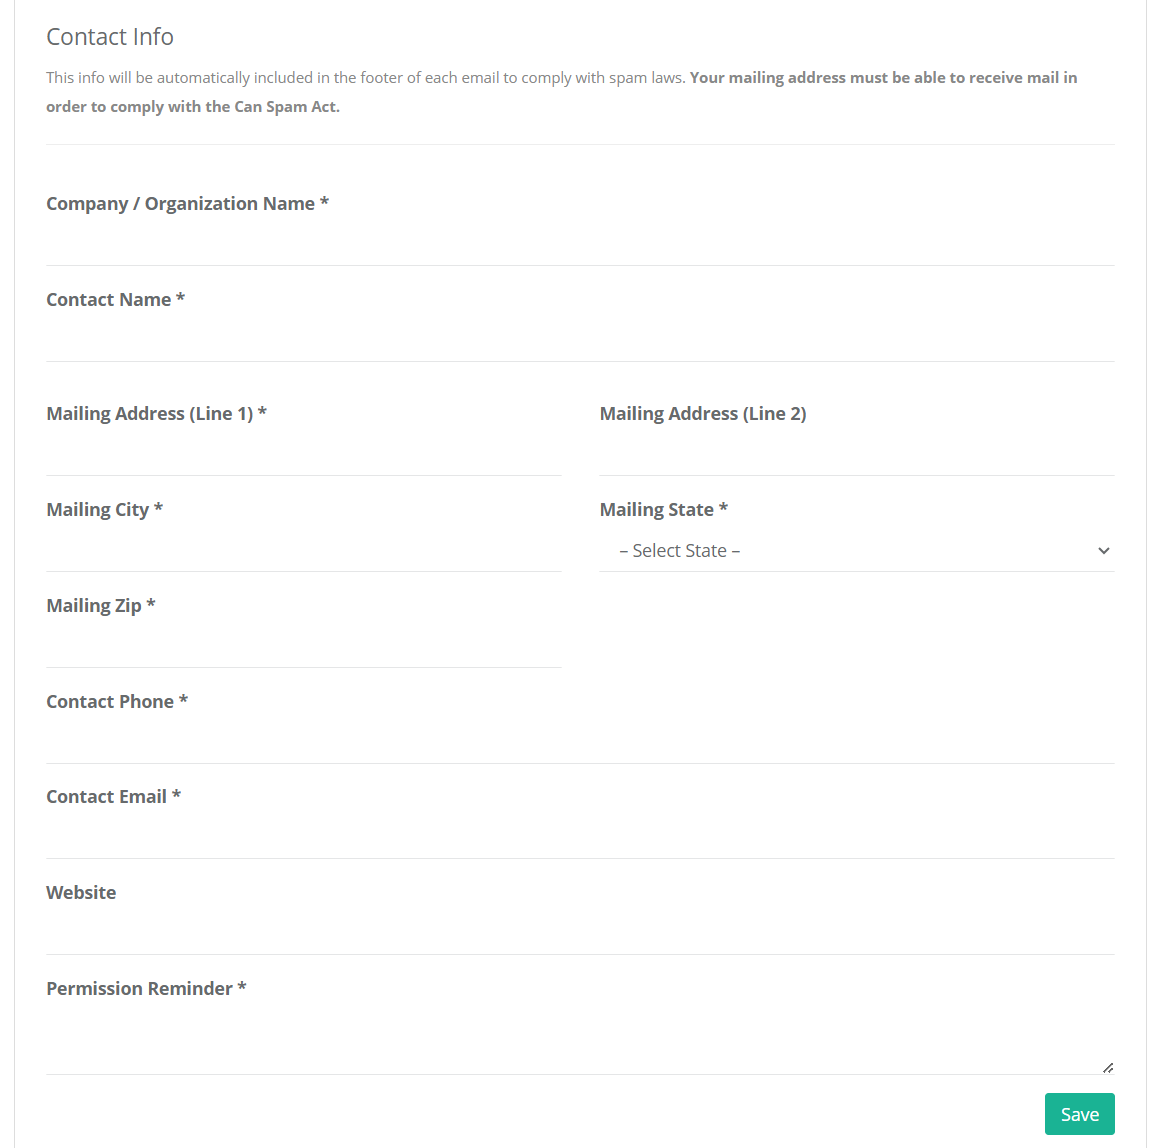
This contact information is required to comply with CAN-SPAM law. It gets included in every email you send.

NOTE: Per the CAN-SPAM law, your address must be a physical address and not a PO box.
The Permission Reminder is a short message to remind your subscribers of how you got their email addresses. It can also help prevent your newsletter from being considered spam.
We recommend a simple permission reminder message such as: "You are receiving this email because you opted-in on our website, at a live event, or requested to be included." Customize this for your situation.
Once you have completed all of the input, click Save to confirm the details and finalize your Newsletter Settings. You can come back and edit these at any time if changes are needed.
