How to verify your domain and add DKIM and SPF to your DNS settings to ensure email deliverability when you send newsletters.
Available for all plans on the Locable Marketing Platform
To enable Locable to send Express Email Newsletters and other customized emails on your behalf, you'll need to adjust a few settings within your account and on your domain. These changes are essential for using your domain for email sending and to enhance the reliability of email delivery, minimizing the chances of your messages being flagged as spam.
NOTE: This feature does require a branded email, meaning an email address that is @yourdomain. If you don't already have a branded email address, this can be set up with your domain host. Read more about why branded email is important here.
After completing the domain configuration, you'll just add a few more details and set your email defaults to be able to send emails.
Let us know if you need assistance (a one-time $50 setup fee may be required for full-service DNS support depending on your plan).
Accessing your Outgoing Mail Settings & Updating Cloudflare
Below are instructions to add your domain to your account, verify that you are the owner of the domain, and set up DKIM and SPF records in your DNS host.
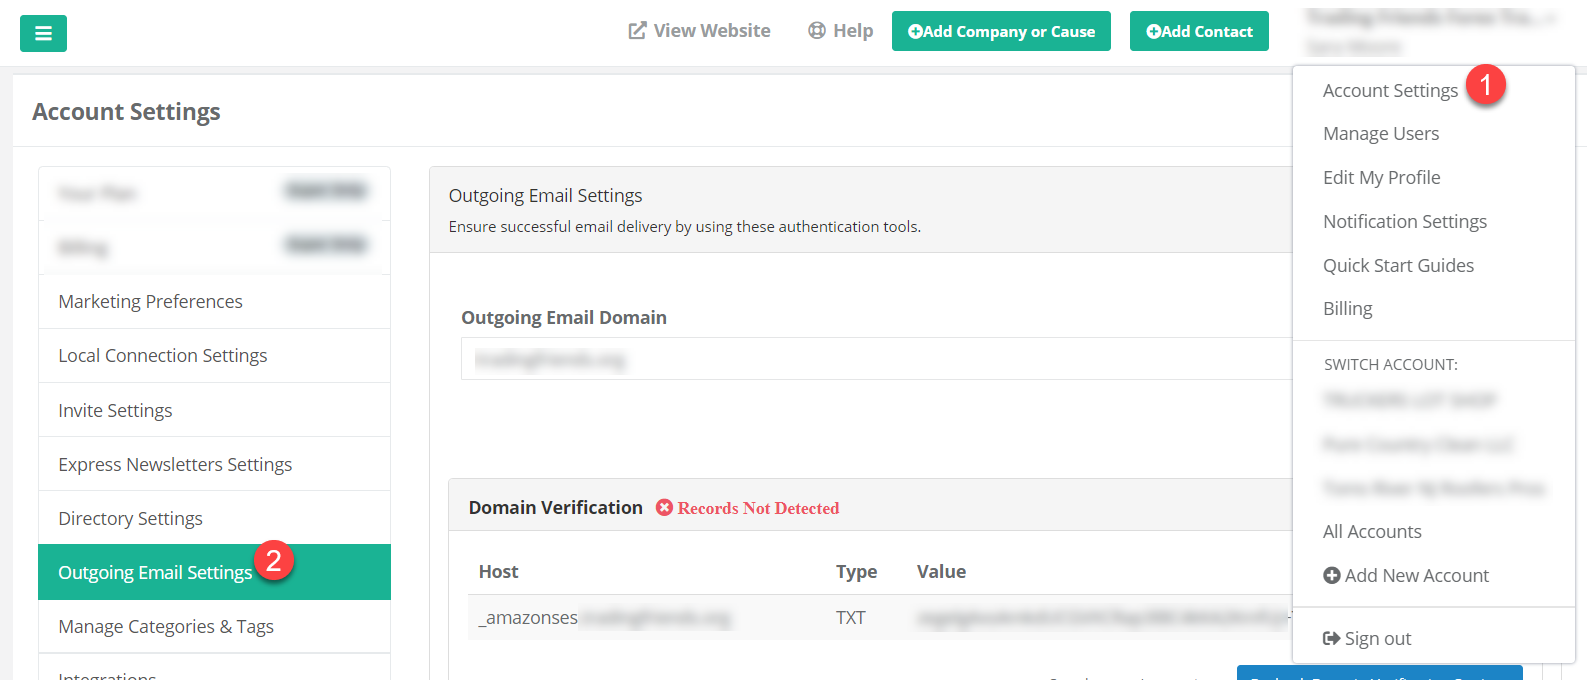
To get started, log in to your Locable account and click on your name in the upper right-hand corner. Then select Account Settings (1). Then go to Outgoing Email Settings (2) in the left-hand menu.

From here you will need to add your Outgoing Email Domain. This is what will be used for sending the Express Email Newsletters. The domain should not include the https:// or the www. (for example, enter 'locable.com' instead of 'https://www.locable.com'.) Then click 'Save'.

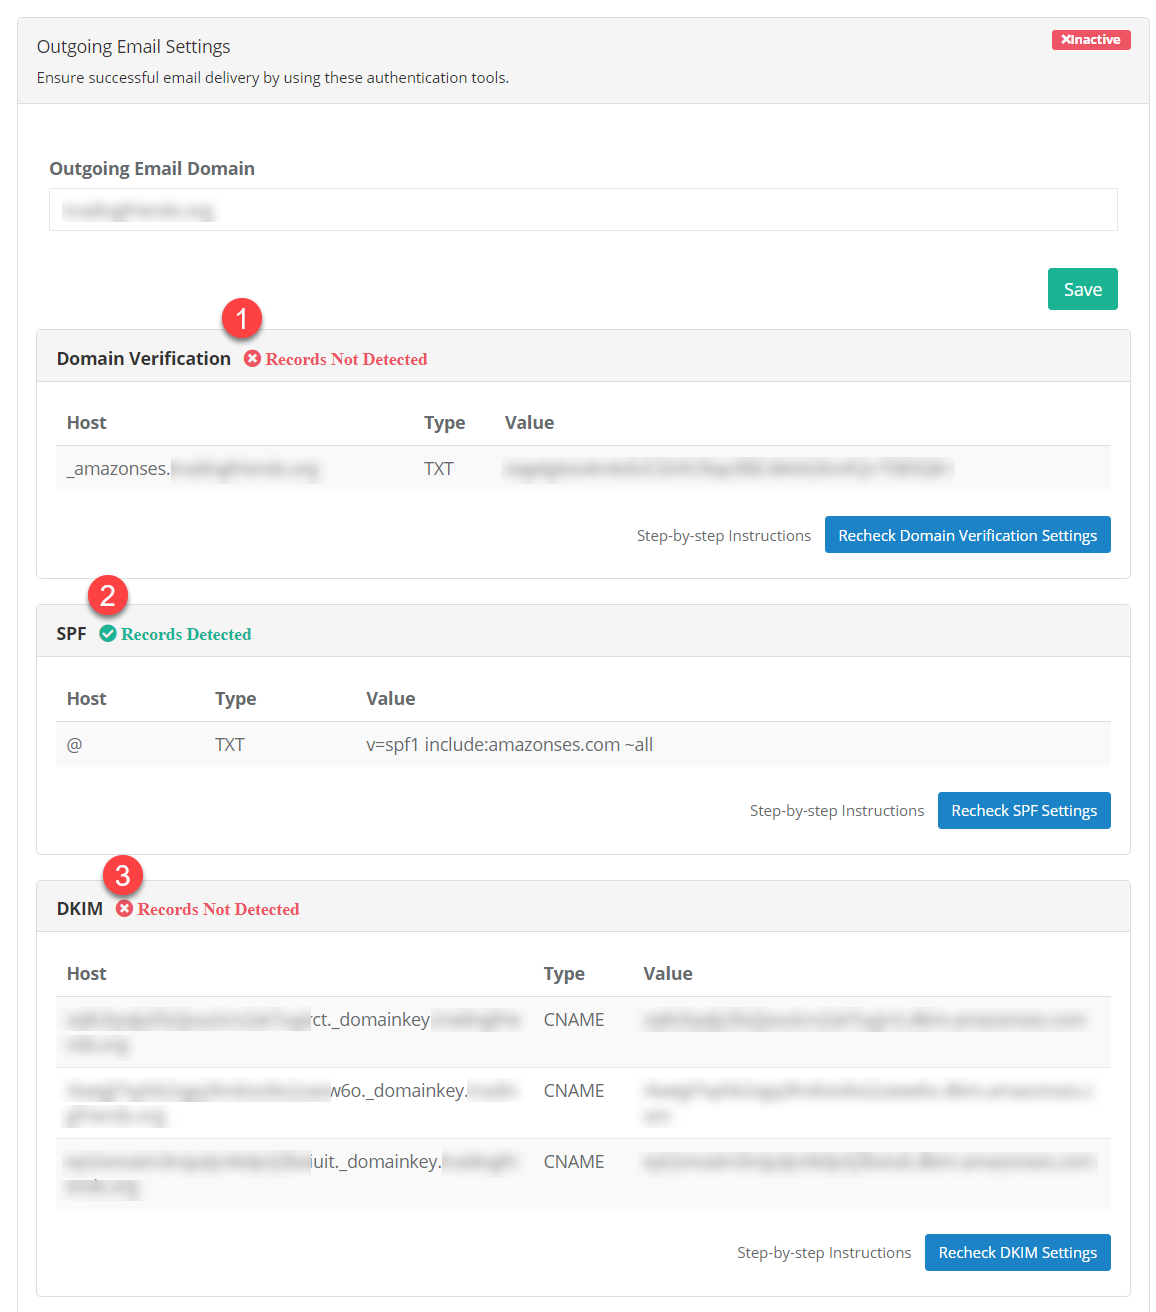
Once you've saved the domain, we will automatically generate a set of DNS records for you to add to Cloudflare. It will include 2 TXT records: one to verify domain ownership (1) and one for SPF (2) and 3 CNAME records for DKIM (3).

NOTE: for the 3 DKIM records please use everything before ".yourdomain.com" as the subdomain including and ending with the "_domainkey" portion.

All 5 of these DNS records must be added to your Cloudflare account.
Once you've updated your DNS settings, it can take up to 72 hours to fully update. You can check your status at any time by visiting the Outgoing Email Settings page and/or clicking the recheck button for each section. When everything is verified you will see a green checkmark in each section as well as an "Active" badge at the top of the page. In the example above, the SPF records are already indicating they are verified.

See below for more information about how to update your DNS settings - we strongly recommend you use Cloudflare to accelerate your site and add SSL / HTTPS.
Updating Your DNS Settings with Different Providers
Different providers have different procedures for updating DNS records. The following table lists links to the documentation for several common providers. This list isn't exhaustive.
| DNS/Hosting Provider | Documentation Link |
| Cloudflare | |
| GoDaddy | |
| Google Domains | |
| Dreamhost | |
| HostGator | |
| Namecheap | How do I add TXT/SPF/DKIM/DMARC records for my domain? |
NOTE: When setting your SPF records you can only have a single TXT file or the SPF records may fail.
You can combine multiple services into a single SPF record as you see below. The order does not matter:

