How to Sell Products & Gift Cards Using the Online Storefront
Our step-by-step e-commerce guide
Available for the Grow & Coordinate plans on the Locable Marketing Platform
Selling online has become a top priority for local businesses. Our e-commerce tools are designed to support fast, easy online transactions with a specific focus on gift cards and featured products.
Things to know
-
Depending on your plan, you may have limited access to Online Storefront (e-commerce) tools. Learn more about what is included in each plan on our Pricing Page.
-
Your Storefront can be added to your website or microsite Powered by Locable or you can sell through your Locable Profile.
-
All Orders are tracked in your Online Storefront and linked to the purchaser in the integrated CRM (based on their email address).
-
Stripe must be connected in order for your Storefront to go live - All credit card transactions are processed by Stripe - learn more about linking Locable to your Stripe account or creating a new Stripe account here
Are you looking to collect donations, charge for event registration, or more? Learn about Collecting Payments Through Forms.
Start by Adding Products
To add products, click About Your Business or Organization > Products, and then click Add a New Product.
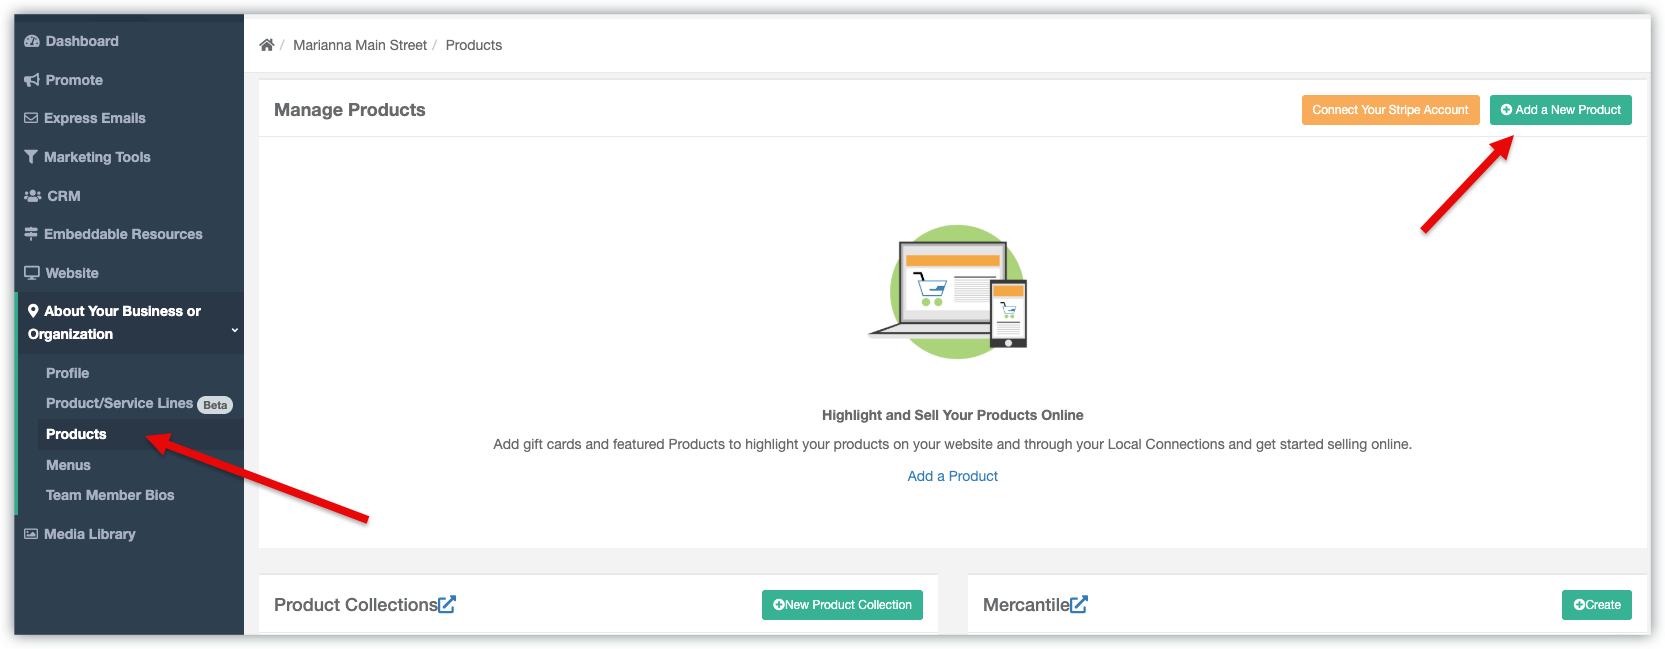
NOTE: You will be unable to add new products until your Stripe account is linked to your Locable account.
To add your product, complete the fields.
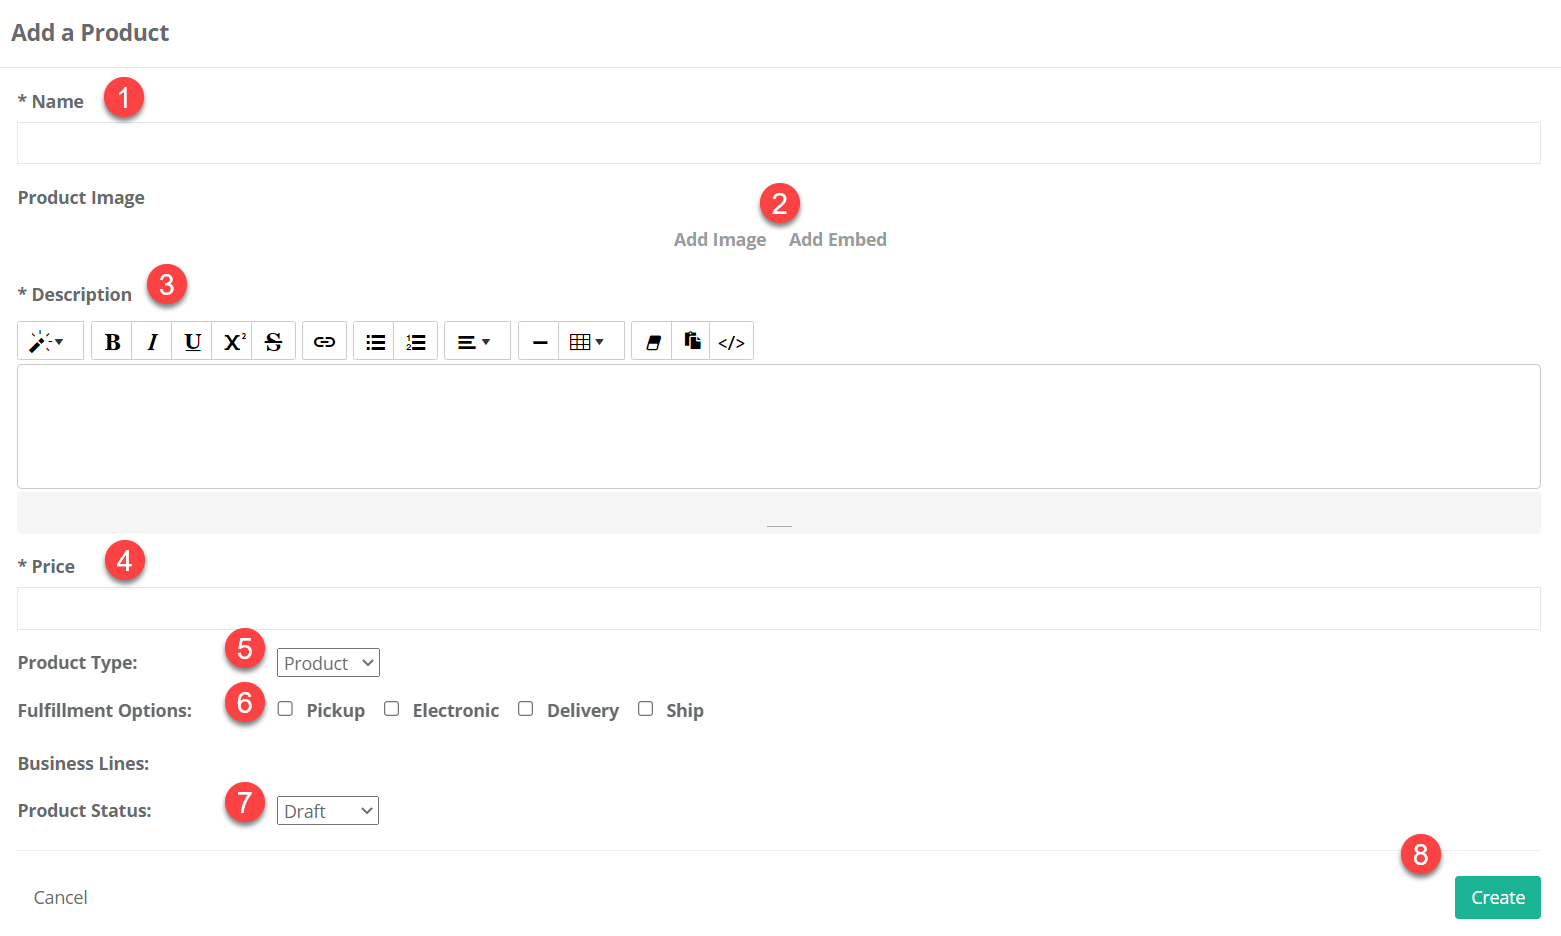
1. Name - Give it a descriptive name (this also helps with SEO - search engines)
2. Image - We strongly recommend that you upload an image of your product!
3. Description - Can be short and sweet or more detailed
4. Price (number not a range) - If you have multiple versions you'll want to create multiple products to match
5. Product Type - This is a simple setting for products, gift cards, or other types
6. Fulfillment Options - What sort of fulfillment options do you offer? Shipping, Pick Up, Delivery etc.
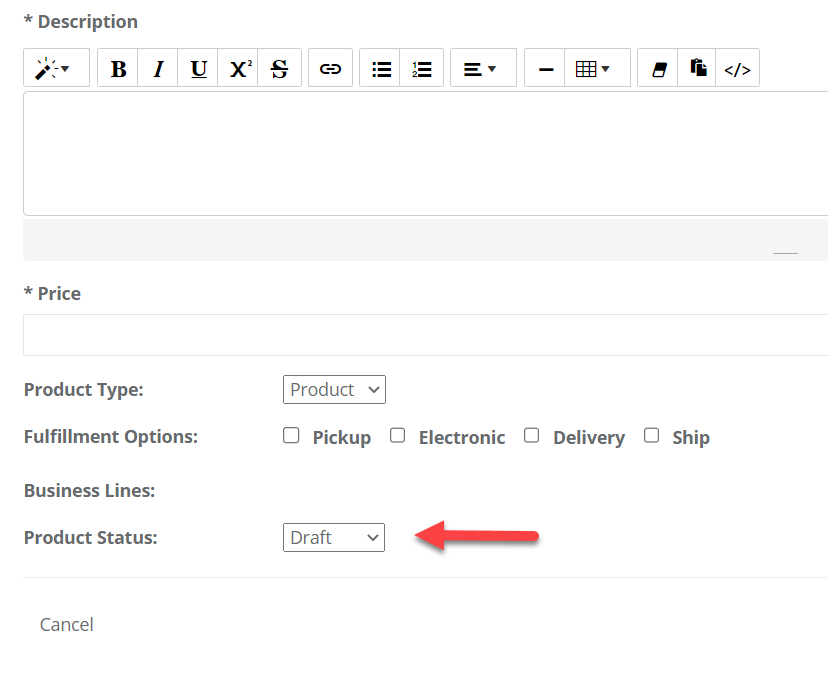
7. Status - Products can be set as drafts, active (live) or archived. Note, once a product has been sold it cannot be deleted, only archived - this is to preserve historical data.
8. Create - Be sure to click here to save your new product.
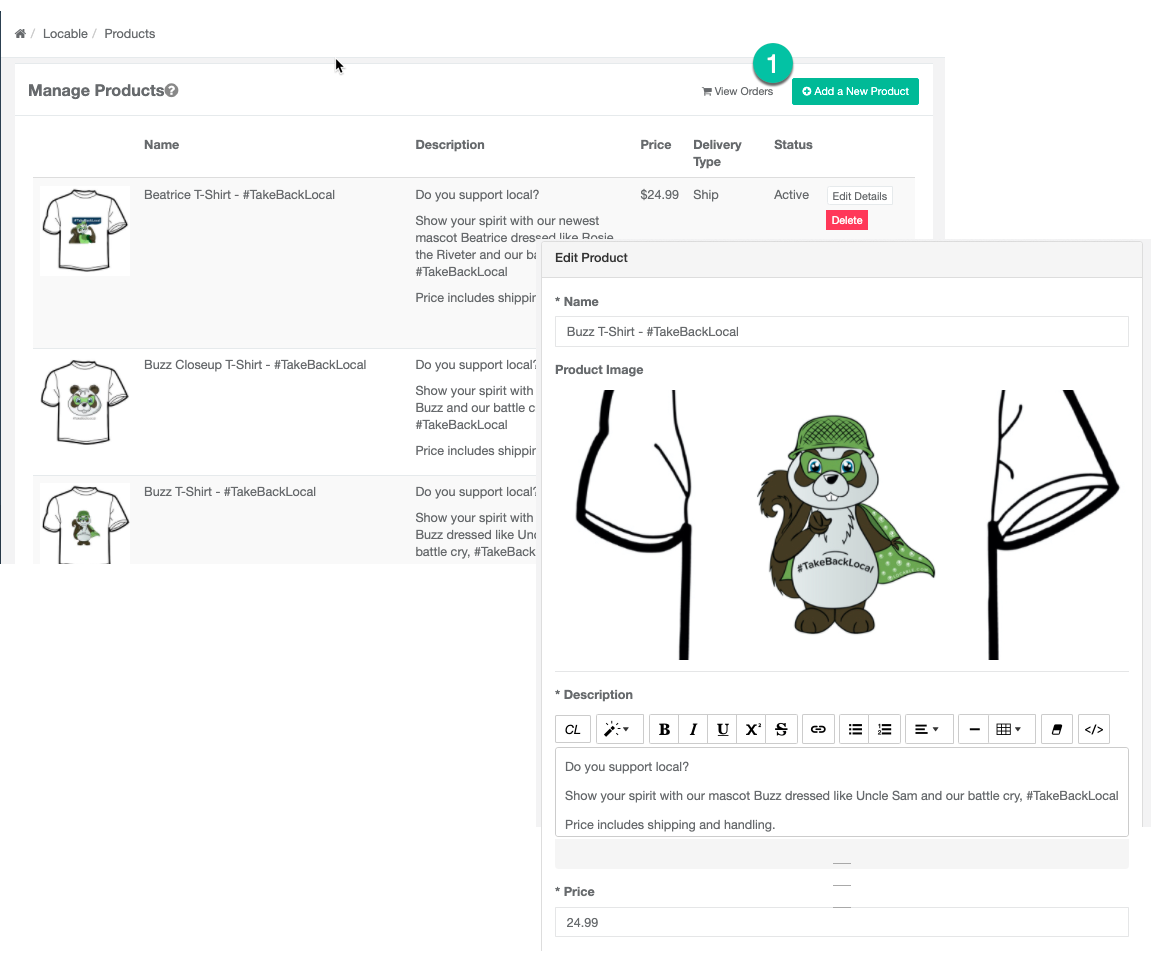
Images are strongly encouraged but not required. Likewise, we suggest you describe any product options and fulfillment details in the description.
You can always edit your product information.
NOTE: To publish your product you will need to select 'Active' from the Product Status drop-down menu during the editing process.
Viewing your Shop
You can view your 'Shop' by clicking here:

Adding your Shop to your Website's Navigation
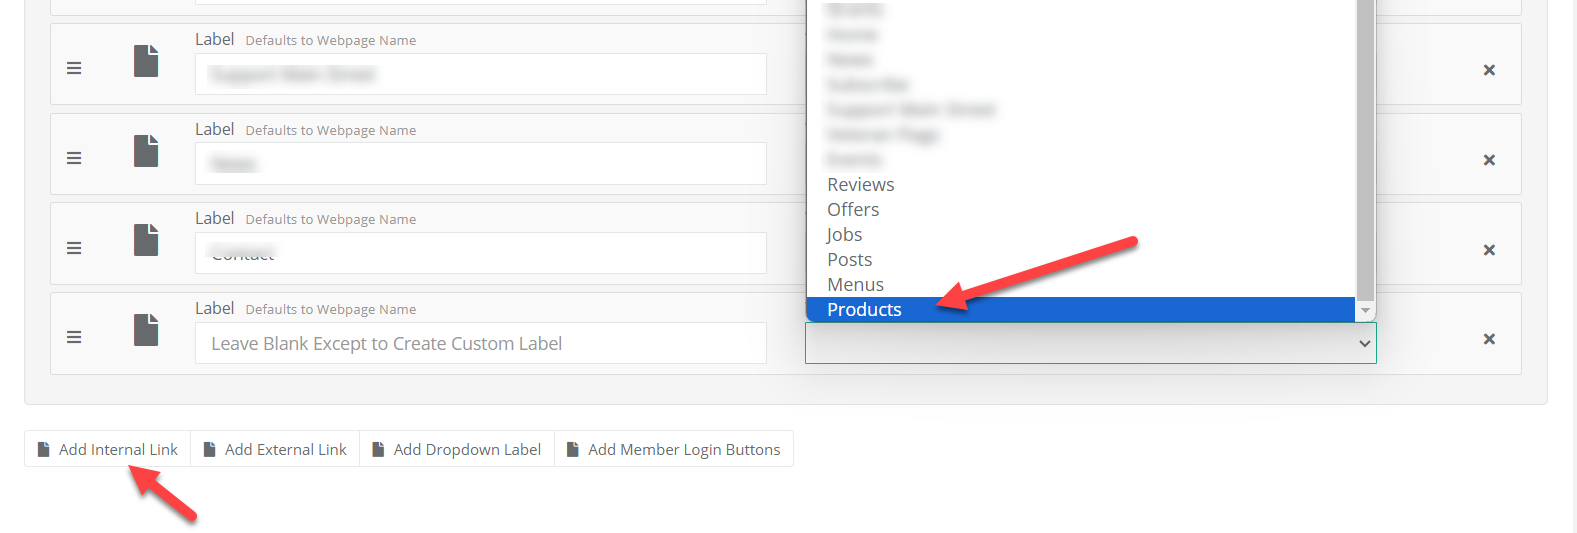
You also have the option to add a link to your site navigation by selecting the Internal link to the built-in 'Products' page in the Navigation settings.
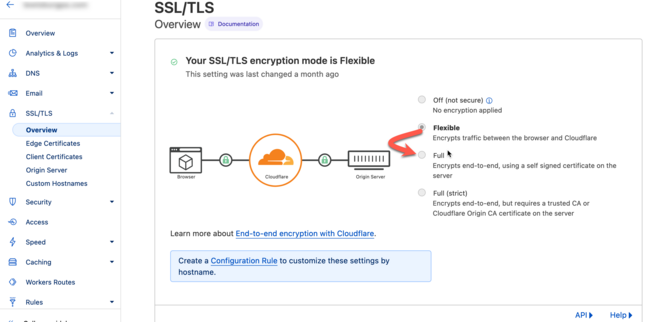
NOTE: You must make sure to have your SSL set to Full and not Flexible encryption in your Cloudflare account, otherwise checkout out won't be possible for security reasons.
Learn more about properly configuring your Cloudflare account here.
![Locable Logo 3a3a3a Gray.png]](https://help.locable.com/hs-fs/hubfs/Locable%20Logo%203a3a3a%20Gray.png?height=50&name=Locable%20Logo%203a3a3a%20Gray.png)
