How to Collect Payments through Forms -Registration, Donations, "Tickets Sales" & More
Form payments can be used to charge for events, collect registration fees, accept donations, and more
Available for the Grow & Coordinate plans on the Locable Marketing Platform
Locable's form builder tool is both powerful and easy to use - learn more about different form tool uses here - you can accept payments on your website through web forms.
Access your forms by clicking Marketing Tools > Forms.
In this article, you'll learn how to add payment options to new or existing forms and use them with events for event registrations.
Things to know
-
Depending on your plan, you may have limited access to form tools. Learn more about what is included in each plan on our Pricing Page.
-
Web forms can be added to your website Powered by Locable through the webpage, blog post, or events directly. For websites on other platforms, you can use the Javascript or iFrame embed codes.
-
All form submissions are recorded in the integrated CRM and associated with the user who submitted the form (based on their email address). Existing users will be updated with the submission activity
Adding payments to a form requires you to link your Locable account with Stripe as the credit card processor and will only work on pages loaded securely over https. Notably, Locable never charges added fees for any transactions and, thus, you only pay merchant fees to Stripe.
Adding a Payment Field to Your Form
Form Payments can be used to charge for events, collect registration fees, accept donations, and more.
Create or Manage a form by clicking Marketing Tools > Forms then Create Form or Edit:

-
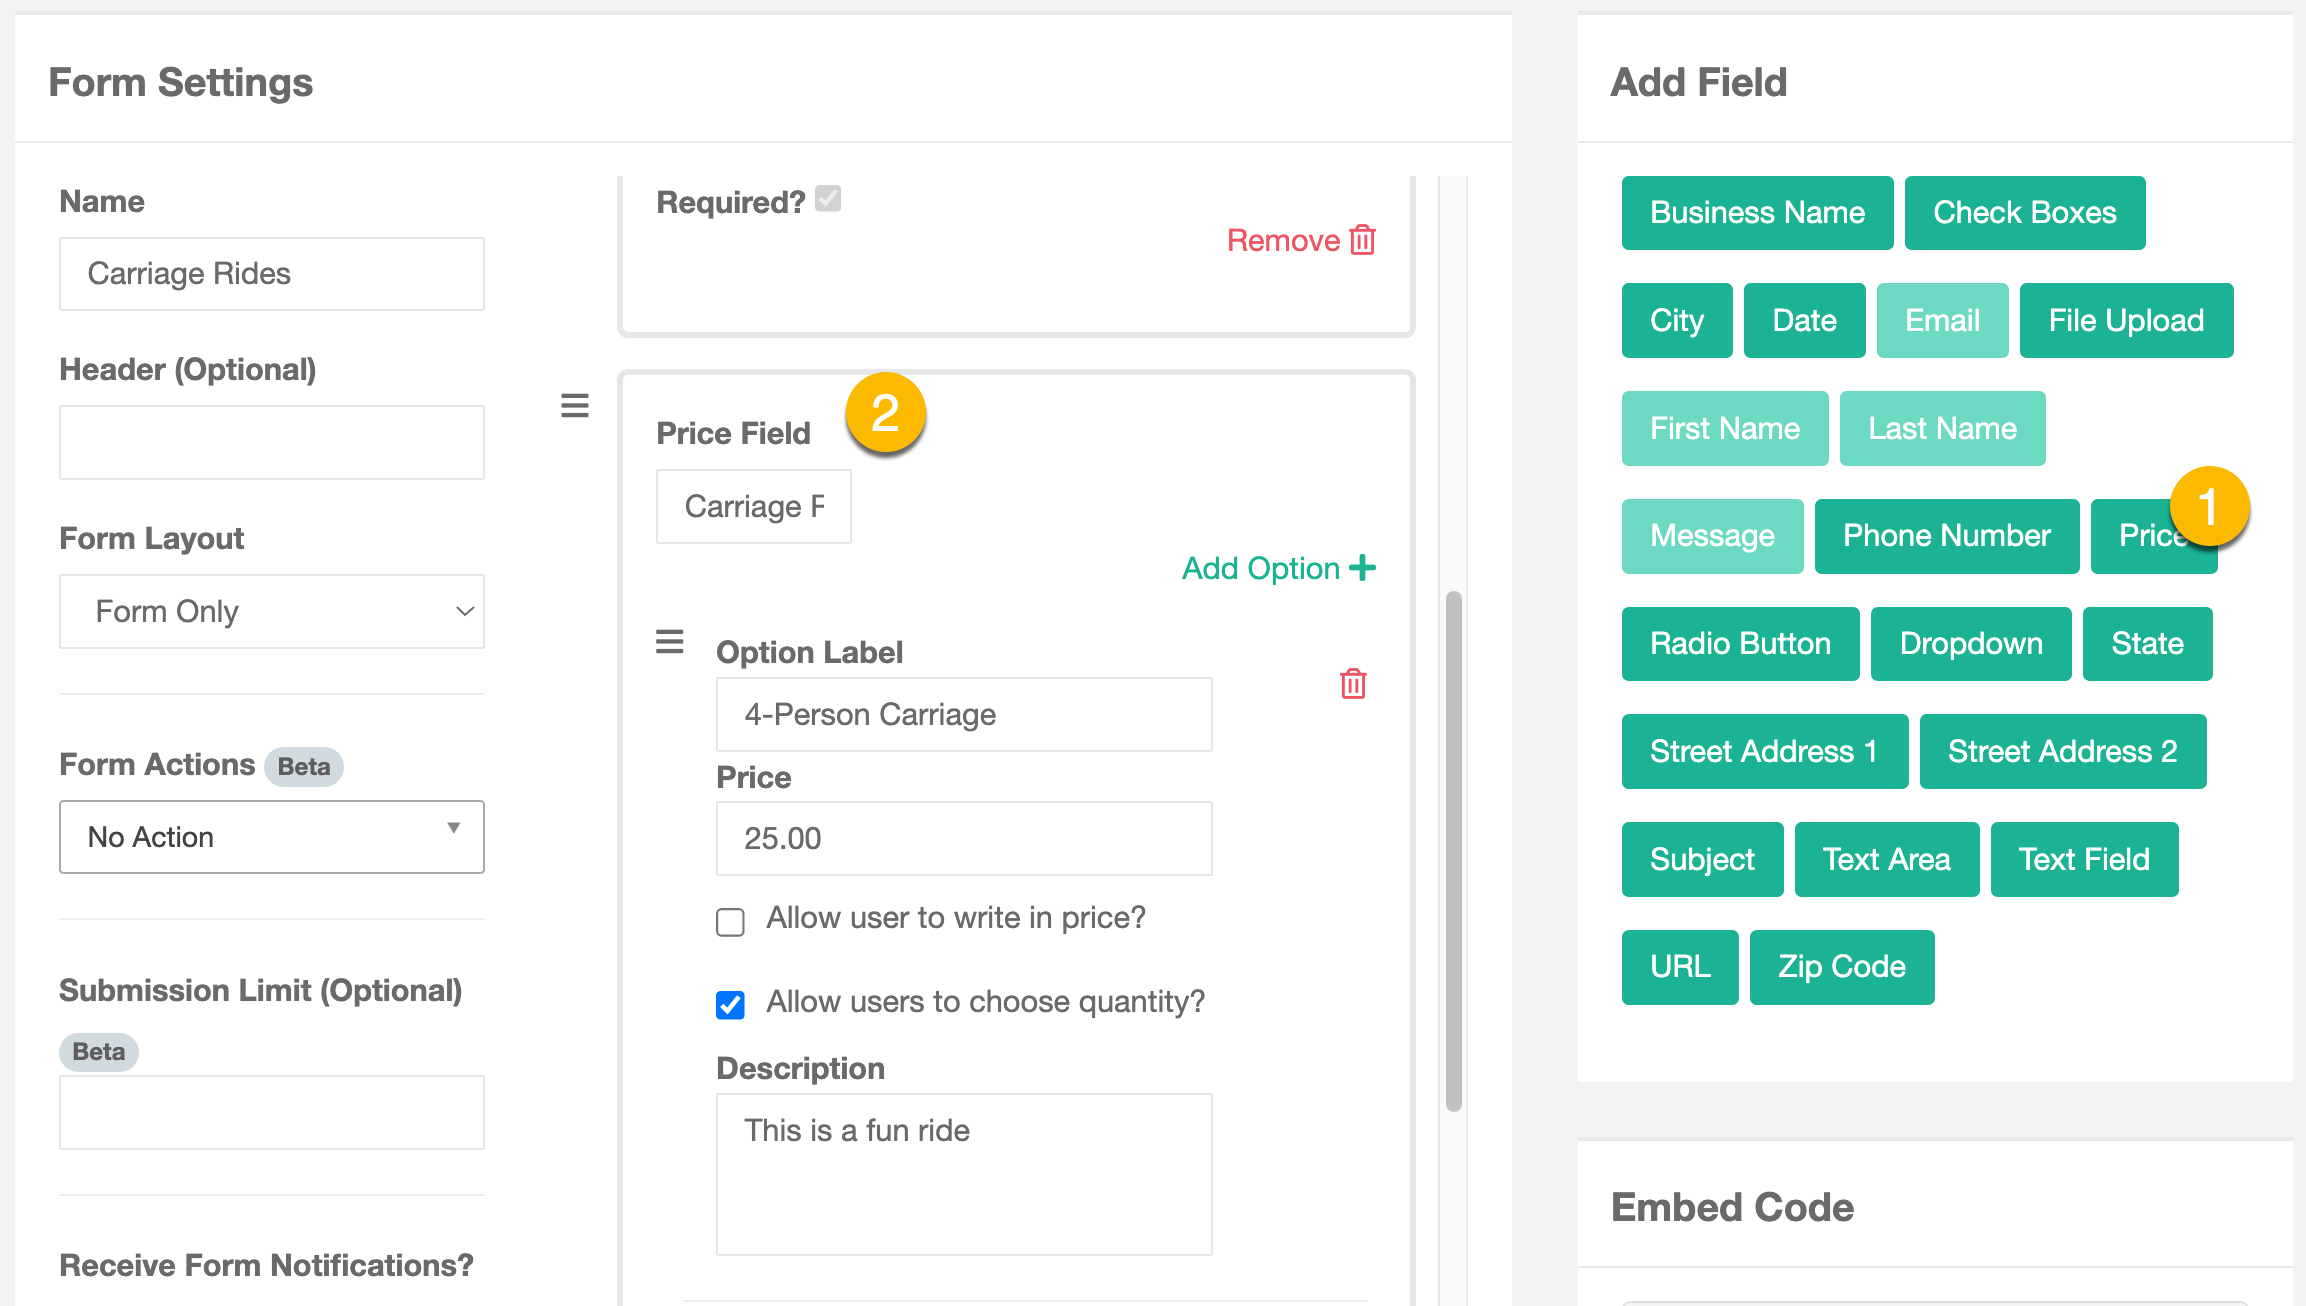
Price is a Field type that can be added to forms
-
Once added, you can define the Field details and options

-
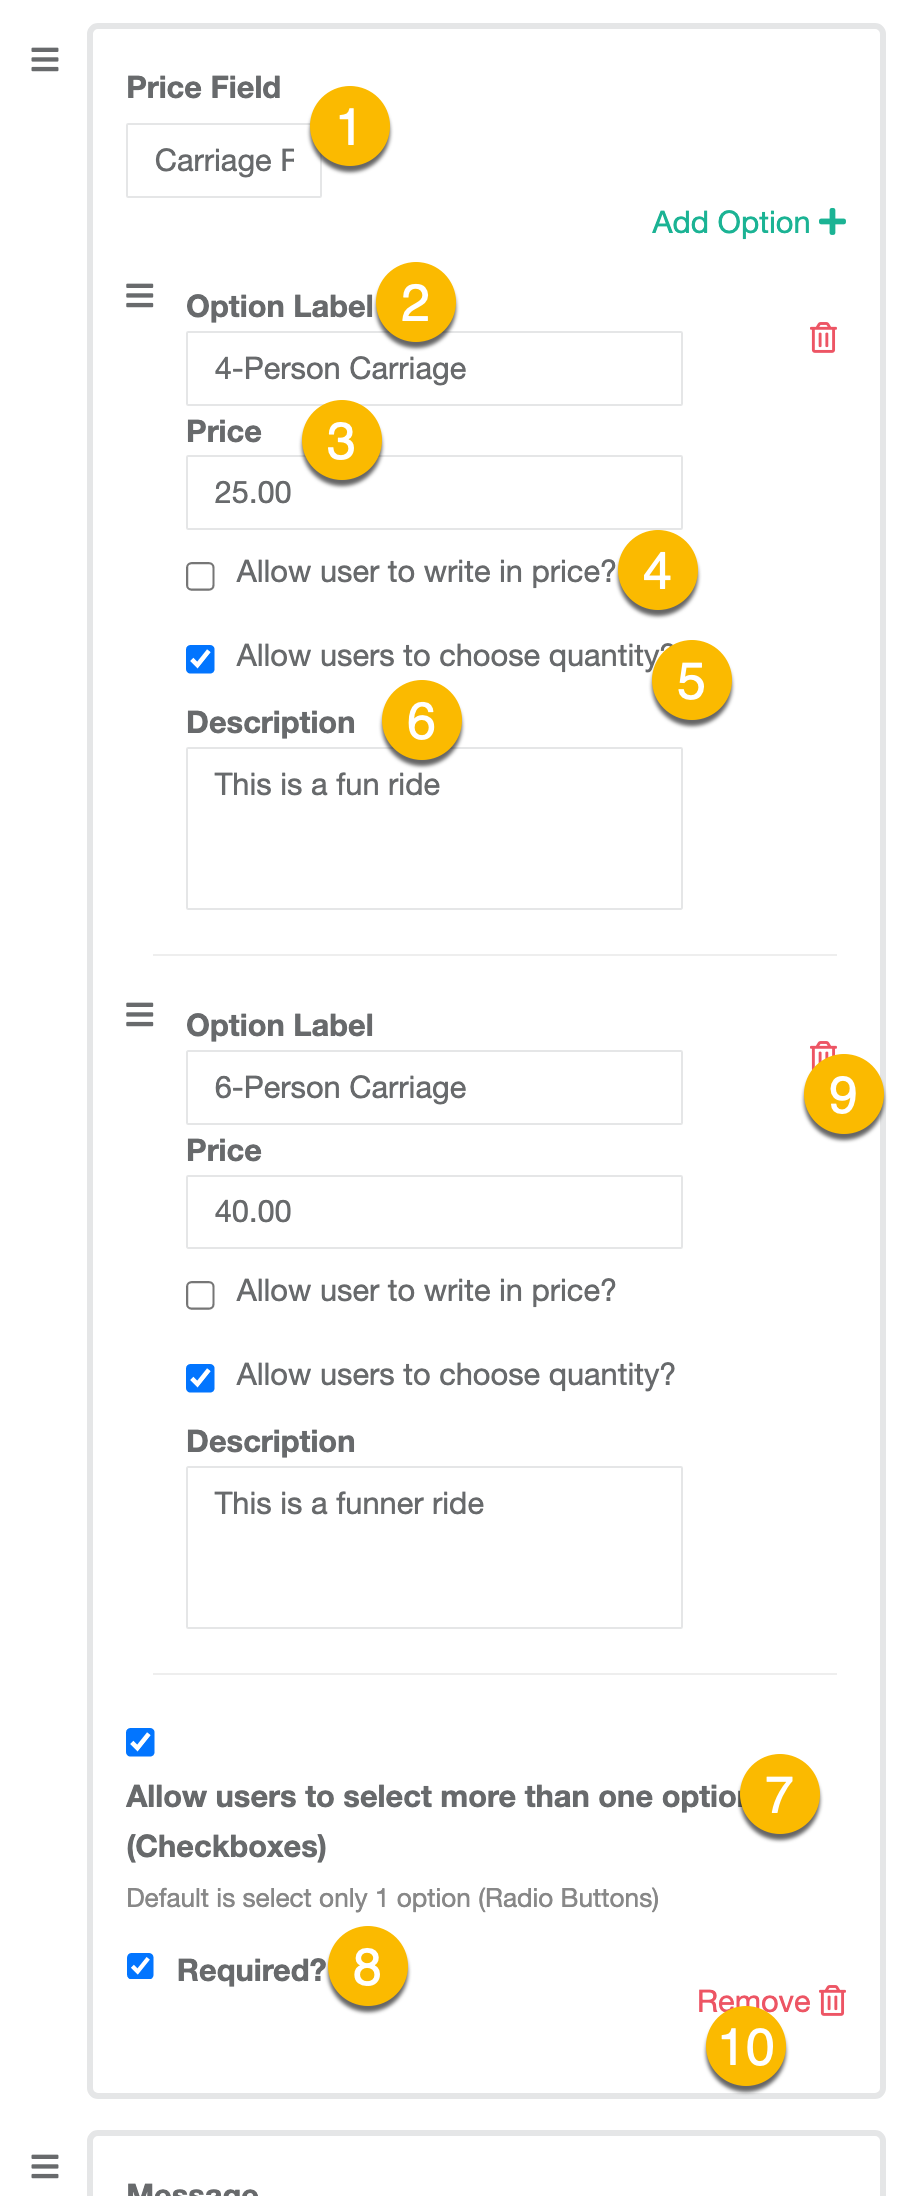
Price Field indicates the label that is displayed on the form
-
You can have one or more Options with their own details
-
Define the Price in dollars and cents
-
For donations and similar activities, you may want one of the options to allow a user to write in the price
-
Quantity: You can enable or disable purchasing more than 1 of each option
-
Add any pertinent details to the Description of the option
-
You can allow people to purchase more than one option or limit them to one
-
Some payment fields may be optional as opposed to required for form submission
-
You can remove individual options by clicking the 'delete' trashcan icon next to that option. This will only remove the specific option and its details.
-
You can remove the entire price field by clicking 'Remove'.
NOTE: In addition to adding options within a Price field, you can add multiple pricing fields to a single form.
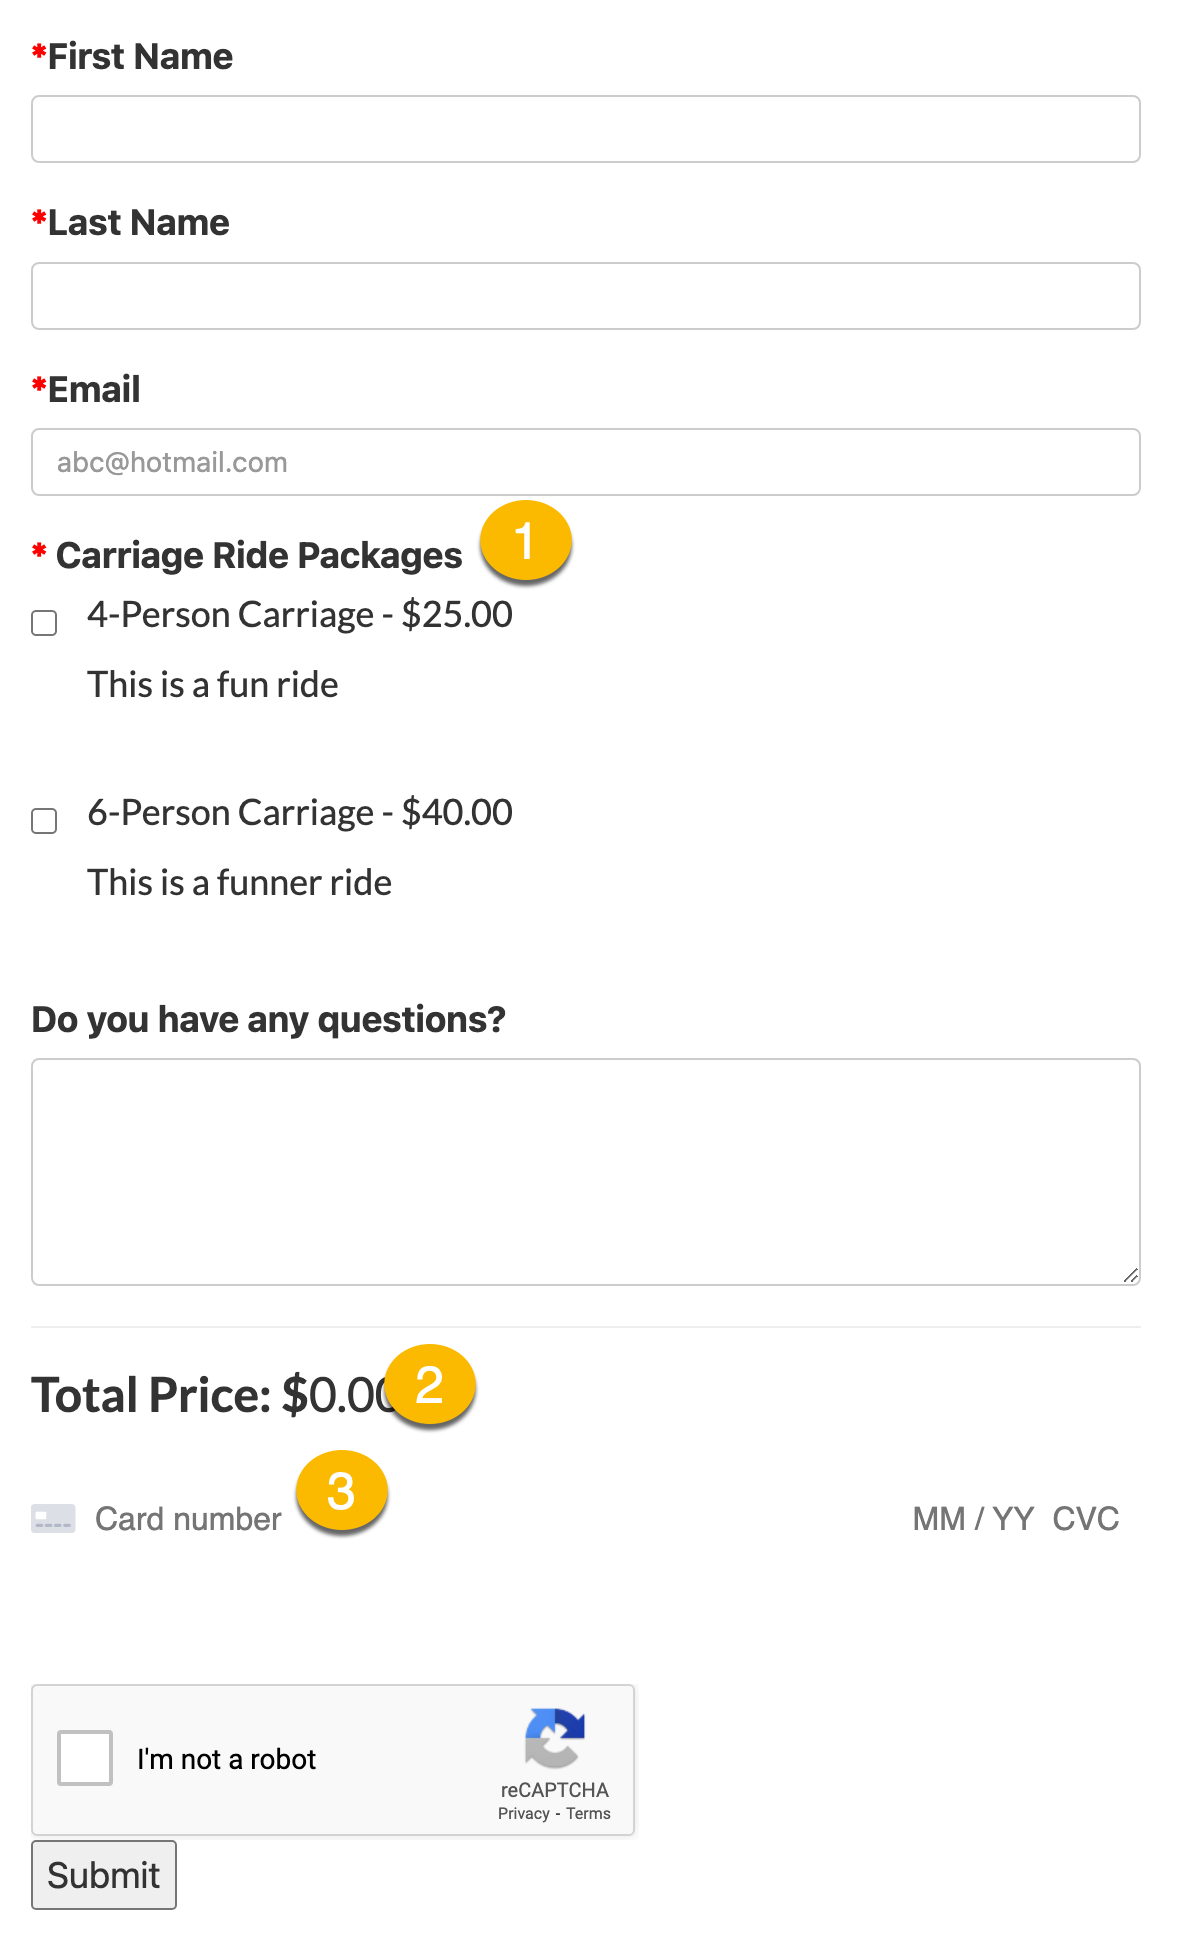
The payment options will appear on the form based on the rules you define with the credit card entry field displayed at the bottom.

-
Here you find the options you defined
-
The price will adjust as the user makes selections
-
Credit card entry field
A Note on Paid Event Registration (Ticketing)
Forms can be paired with events to enable you to collect and track event registration, learn more about using forms for event registration here.
Charging attendees or "selling tickets" is a great use case (note, Locable does not generate printable tickets however a PDF may be used as part of a Form Action).
![Locable Logo 3a3a3a Gray.png]](https://help.locable.com/hs-fs/hubfs/Locable%20Logo%203a3a3a%20Gray.png?height=50&name=Locable%20Logo%203a3a3a%20Gray.png)