![Locable Logo 3a3a3a Gray.png]](https://help.locable.com/hs-fs/hubfs/Locable%20Logo%203a3a3a%20Gray.png?height=50&name=Locable%20Logo%203a3a3a%20Gray.png)
Available for all plans on the Locable Marketing Platform
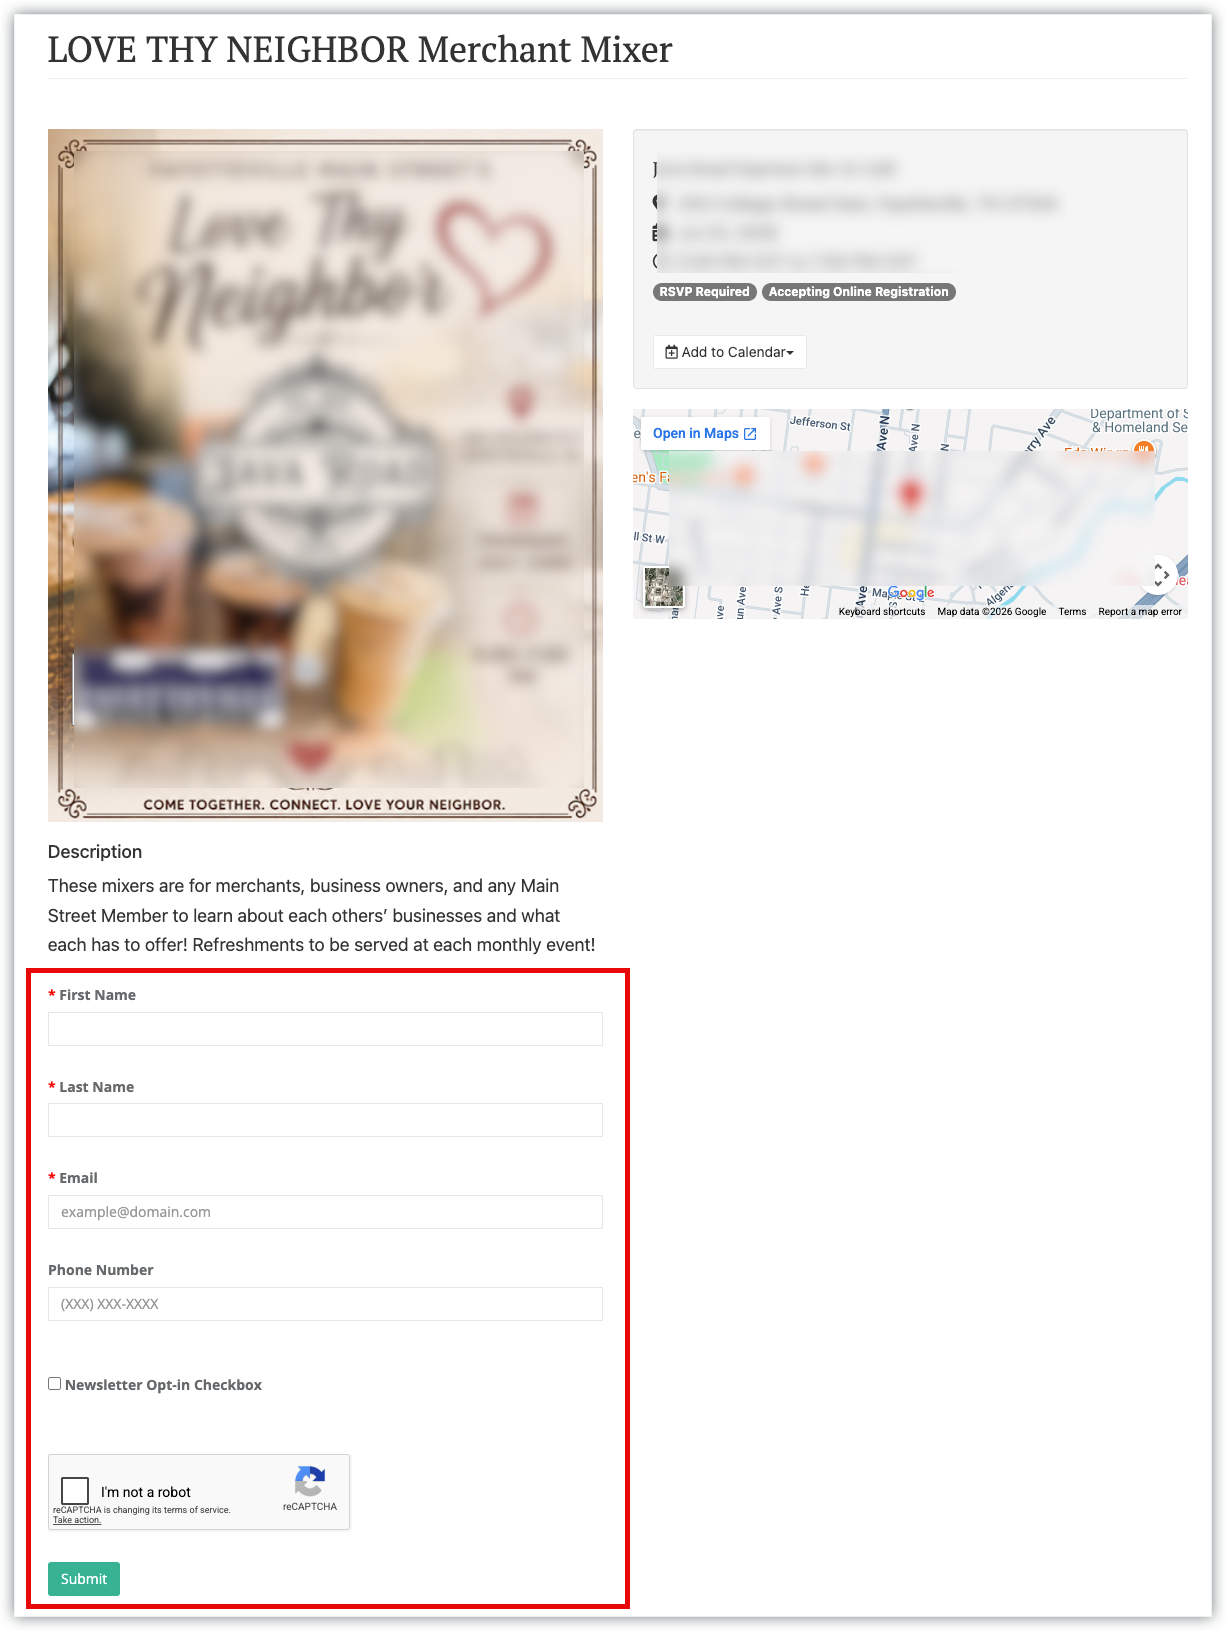
Locable's built-in Event Registration feature lets visitors register directly from your event post while keeping registrations connected to the event.
Event Registration is powered by a Form, making it easy to collect attendee information, send confirmation and reminder emails, and track registrations from one place.
Tip: You can reuse the same registration form across multiple or recurring events, or create a unique form for each event. Regardless of which approach you choose, registrations are tracked separately for each event.
Step 1: Create Your Registration Form
Before you start collecting registrations, you'll need to create a registration form with the integrated form tool.
Go to Marketing Tools > Forms to create a new form.

There are a couple of things to note about forms created to use with Event Registrations.
- You'll see your standard list of required and optional fields - keep these to a minimum
- Here are the available form fields. You can learn more about accepting Form Payments to charge admission for events.
- The form Name is to keep you organized - make sure it is clear to you which events the form will be used for.
- Use the Optional Header as a title for your form to let people know why they should fill it out. For example, 'Register Today!'"
- For Event Registrations, use the Standard Form option.
- You can choose to create a Form Action which will allow you to display a confirmation message when the form is submitted or to send an email response automatically when the form is submitted.
- If you have limited attendance, you can limit the number of form submissions.
- You can choose who will be notified of the form submission.
Step 2: Attach the Form to Your Event
Once your form is created, you can post your event. If you've already posted your event, you can edit it and add the registration form.
Click Promote > Event to create a new event post or update an existing post.
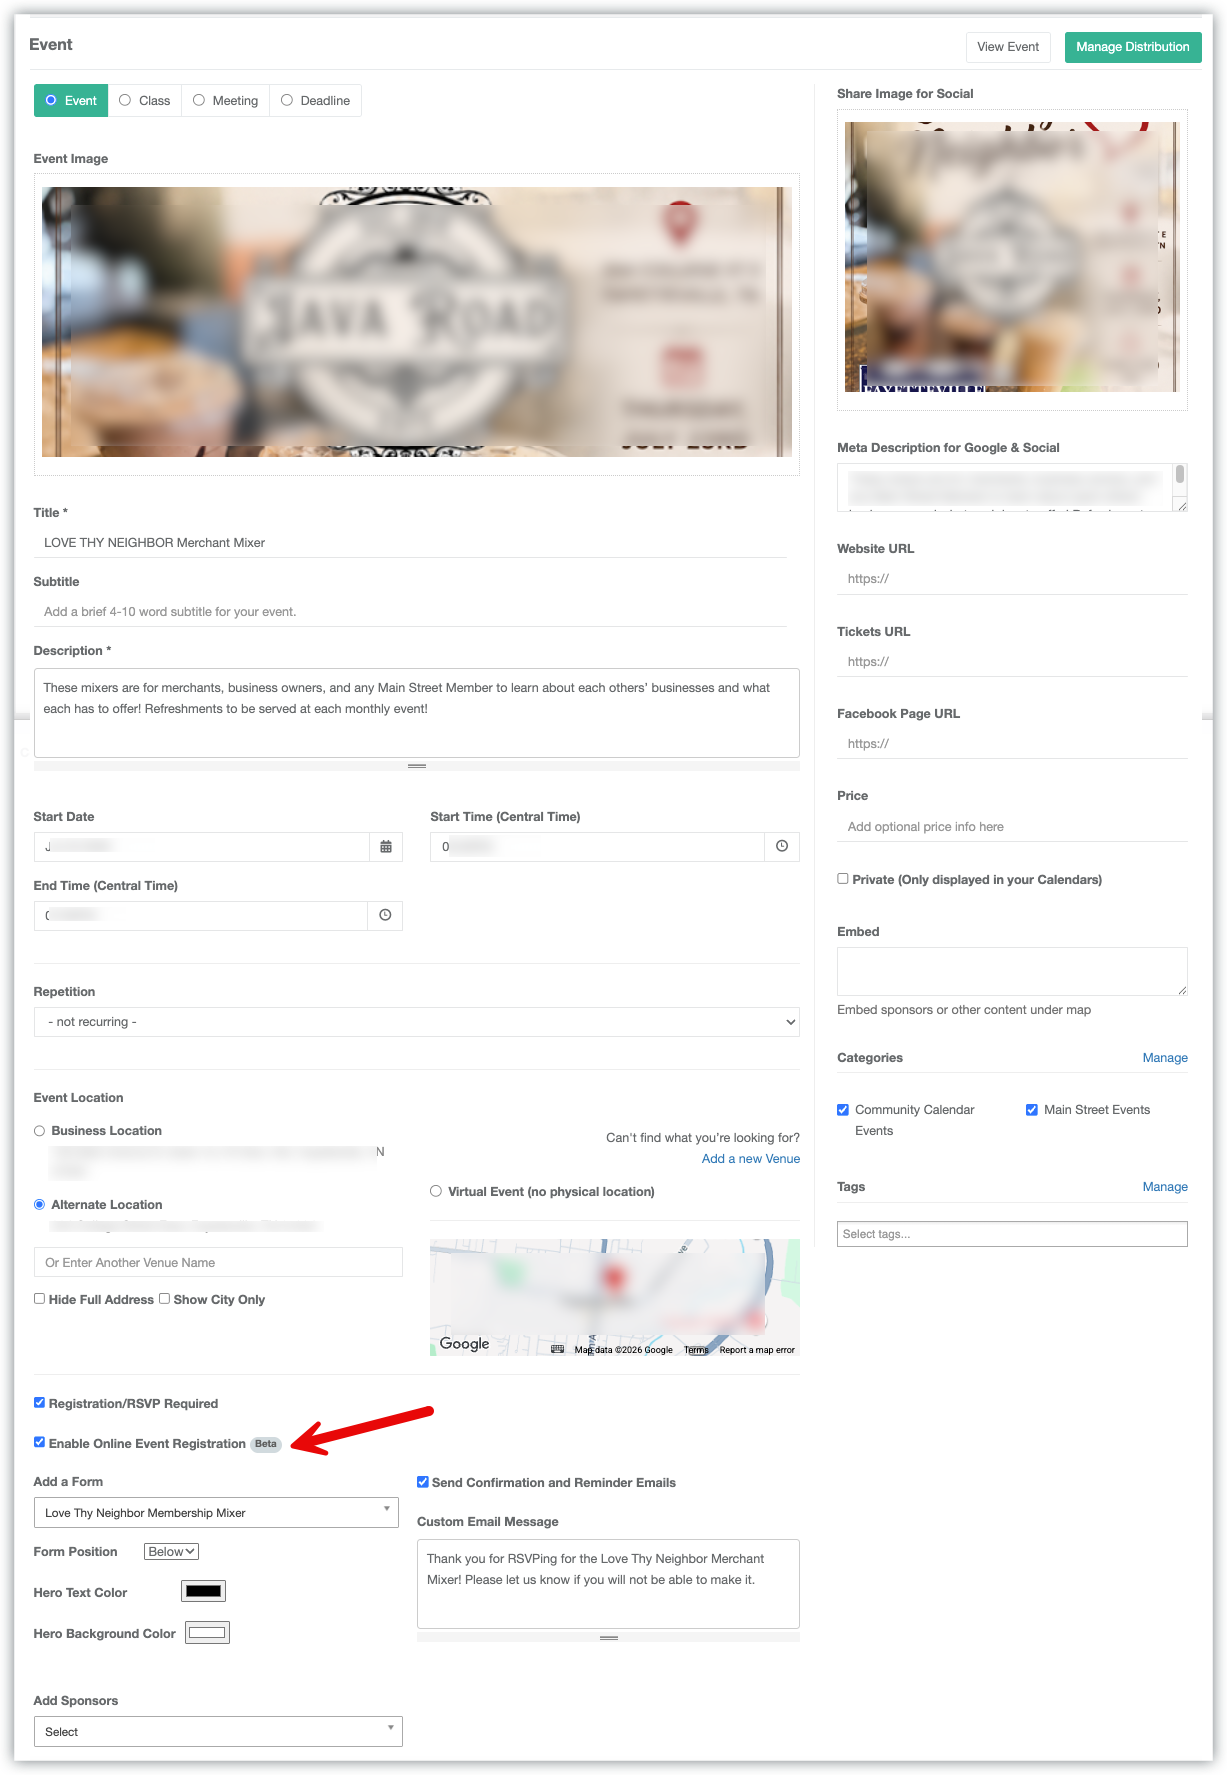
When you enable Event Registration, you'll be able to:
- Select your registration form.
- Choose whether the form appears above or below the event details.
- Customize the Hero background and text colors when displaying the form above the event.
- Enable confirmation and reminder emails. Reminder emails will be sent out 24 hours before the event, and again 1 hour before the event.
- Add a custom reminder message for registrants.
Best Practices
To provide the best experience for your audience and get the most from Event Registration, we recommend the following:
- Share the event page when promoting your event. Instead of directing people to a standalone registration form, link to the event itself so visitors can view all of the event details and register from a single page.
- Keep visitors on your website. Registering directly from your event page creates a seamless experience and keeps traffic on your website instead of sending people to another domain.
- Use Event Registration for every event that requires registration. Attaching the form to the event keeps registrations connected, making it easier to manage attendees and track registrations. Learn about tracking registrations and attendees here.
- Reuse forms when it makes sense. If you're collecting the same information for recurring or similar events, you can use the same registration form while still tracking registrations separately for each event.
- Keep registration forms simple. Ask only for the information you truly need. Shorter forms generally lead to higher completion rates.
- Enable confirmation and reminder emails. Automatic emails reassure attendees that their registration was received and help reduce no-shows by reminding them before the event.
Tip: As Event Registration continues to evolve, events using the built-in registration feature will automatically benefit from future enhancements without requiring changes to your workflow.