![Locable Logo 3a3a3a Gray.png]](https://help.locable.com/hs-fs/hubfs/Locable%20Logo%203a3a3a%20Gray.png?height=50&name=Locable%20Logo%203a3a3a%20Gray.png)
Available for the Coordinate plans on the Locable Marketing Platform
The Business Directory feature in Locable is one of many tools you can use to highlight your Local Connections™ and support local businesses.
With a free Engage Plan, you can create a simple directory for cross-promotion. Upgrading to the Coordinate Plan unlocks Tiered Directories for more advanced display and management options.
Learn more about how to use Business Directories to support your Local Connections™.
What Are Tiered Directories?
Tiered directories display in a 'list view' and give you granular control over how listings appear in your directory. This is ideal when you offer multiple membership levels and want to highlight premium members with more visibility and information.
Each tier can include unique display settings such as layout, listing order, and what fields or content are shown.

How to Enable a Tiered Directory
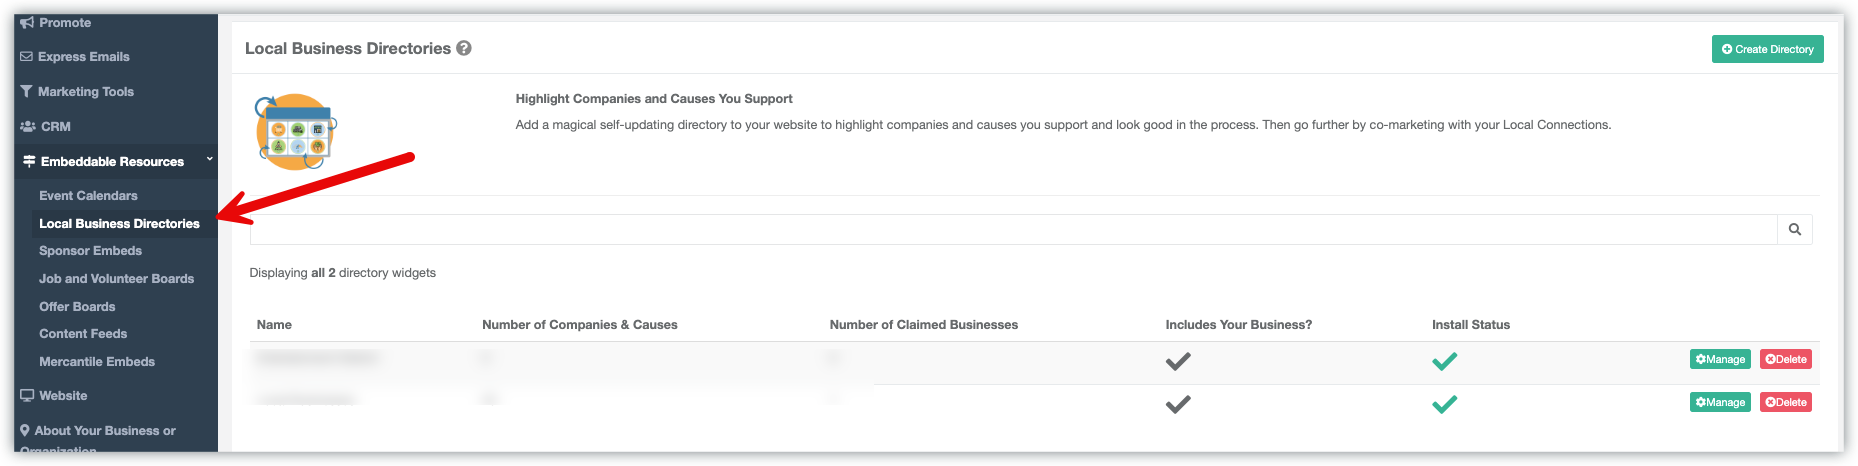
Directory Type is defined in your Directory Settings. Go to Local Connections > Local Business Directories click 'Manage' for the directory you'd like to edit.
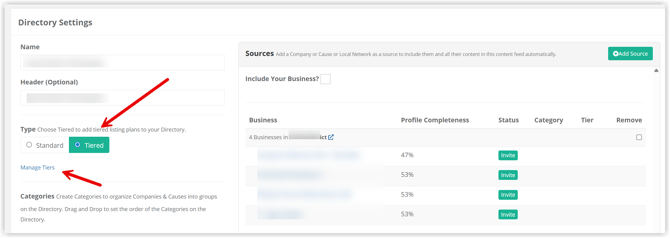
Then change the Type to Tiered Directory, and click Manage Tiers to begin creating and customizing your tiers.
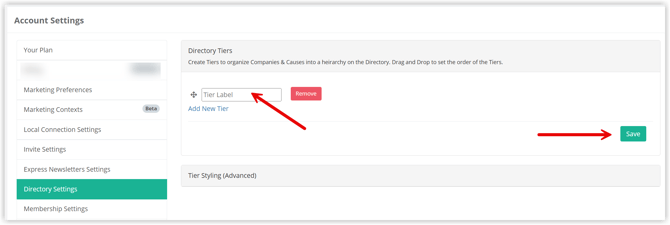
NOTE: You can also access tier settings by going to your Account Settings > Directory Settings via the menu under your business name in the top-right corner.

Managing Tiers
Once inside the Manage Tiers panel, you can:
-
Add new tiers by entering a name/label
-
Edit tier display settings (covered below)
-
Reorder tiers using drag-and-drop
-
Remove or modify tiers at any time
Always click Save to apply changes.
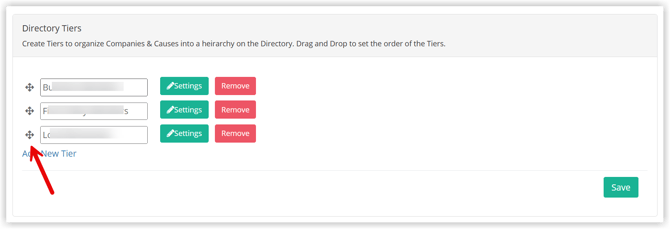
Add Your Tiers
Enter the new Tier Label and click 'Save'.
Configuring Tier Settings
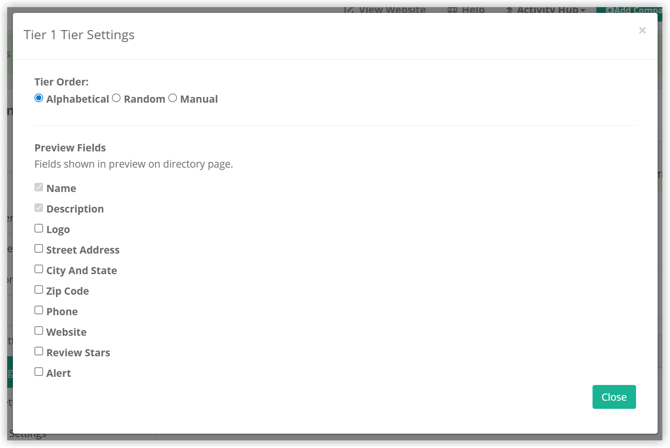
Once the Tier is saved, you can click the Settings button next to any tier to define how listings in that tier will appear.
 For each tier, you can:
-
Choose listing order: alphabetical, random, or manual
-
Select which fields are visible (e.g. description, phone number, social links)
-
Decide what visitors see when they click a listing. For example, premium tiers may show full profiles, while basic tiers might show limited information.
NOTE: You can use a single tier just to manually order listings, even without offering multiple membership levels.
Setting the Order or Reordering the Tiers
Once the tiers are saved, you can drag and drop to reorder how they will appear in the directory.
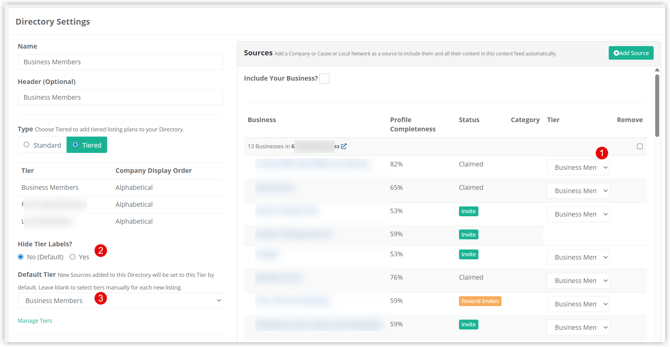
Directory Settings After Tiers Are Set
After your tiers are defined, return to your directory's settings to:
-
Assign each listing to the correct tier
-
Choose whether to show or hide tier labels publicly
-
Set a Default Tier (this tier is automatically assigned to new listings unless the tier is changed in the Directory Settings)
-
Within the Directory Settings, you will need to assign the appropriate tier to each listing.
-
Make sure to Save the changes to your Directory Settings once you've completed your input