Managing Categories in a single directory while supporting your Local Connections™
Available for all plans on the Locable Marketing Platform
The Business Directory feature in Locable is one of many tools we offer to highlight your Local Connections™.
Learn more about how to use Business Directories to support your Local Connections™.
The free Engage Plan includes great options for cross-promotion while the Coordinate Plan offers advanced options and unlocks Tiered Directories.
Setting Categories in Directory Settings
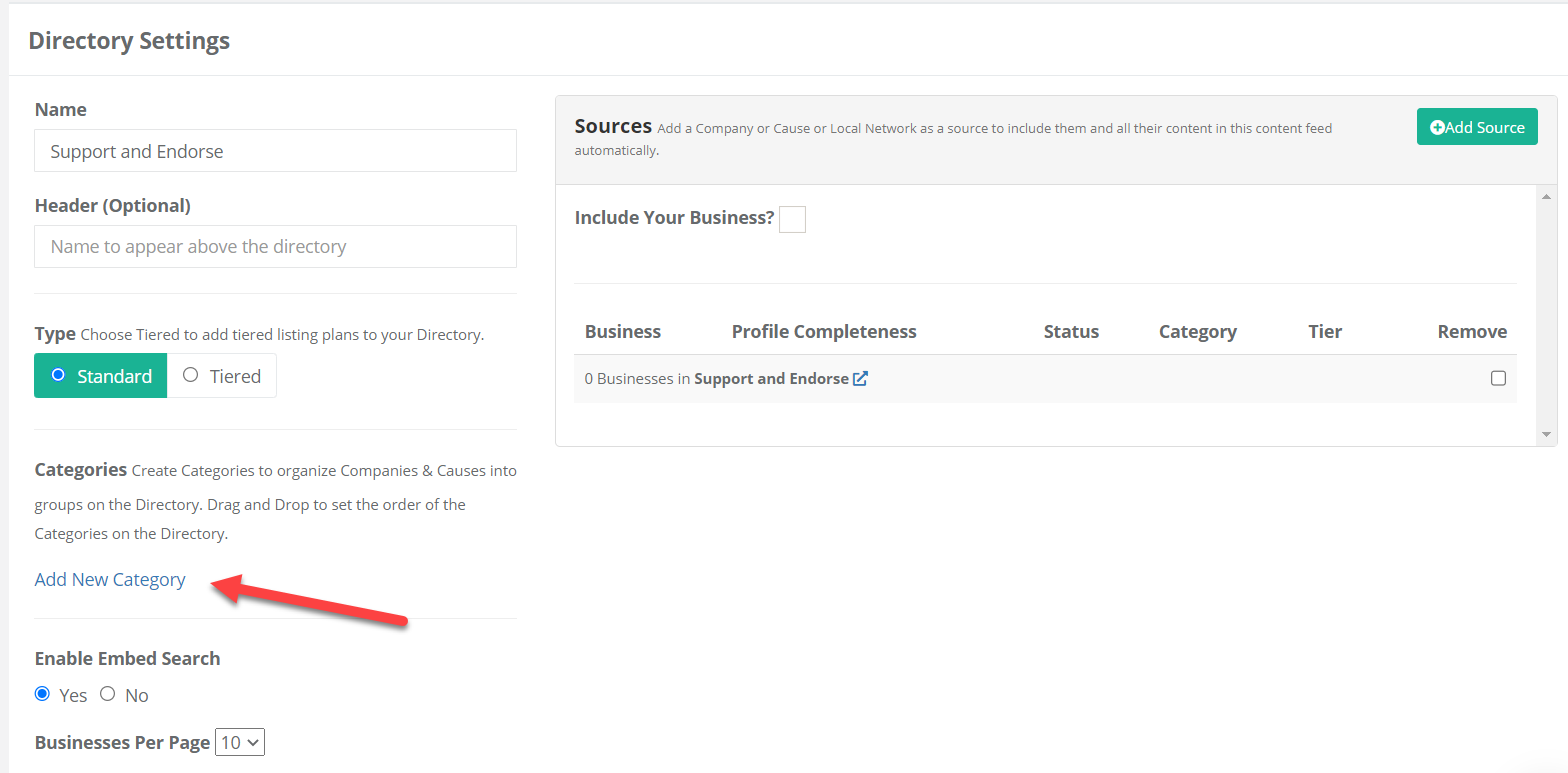
Once you have created your directory, you can adjust the Directory Settings at any time. To do this, go to Embeddable Resources> Local Business Directories and then click 'Manage' to access the Directory Settings. Here, you'll be able to adjust the settings for the selected directory.
To create Categories within a single directory, click on 'Add New Category':

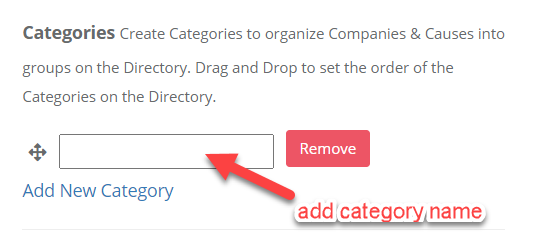
Then add a name for your Category. Continue to click 'Add New Category' and input names until all of your Categories have been created:

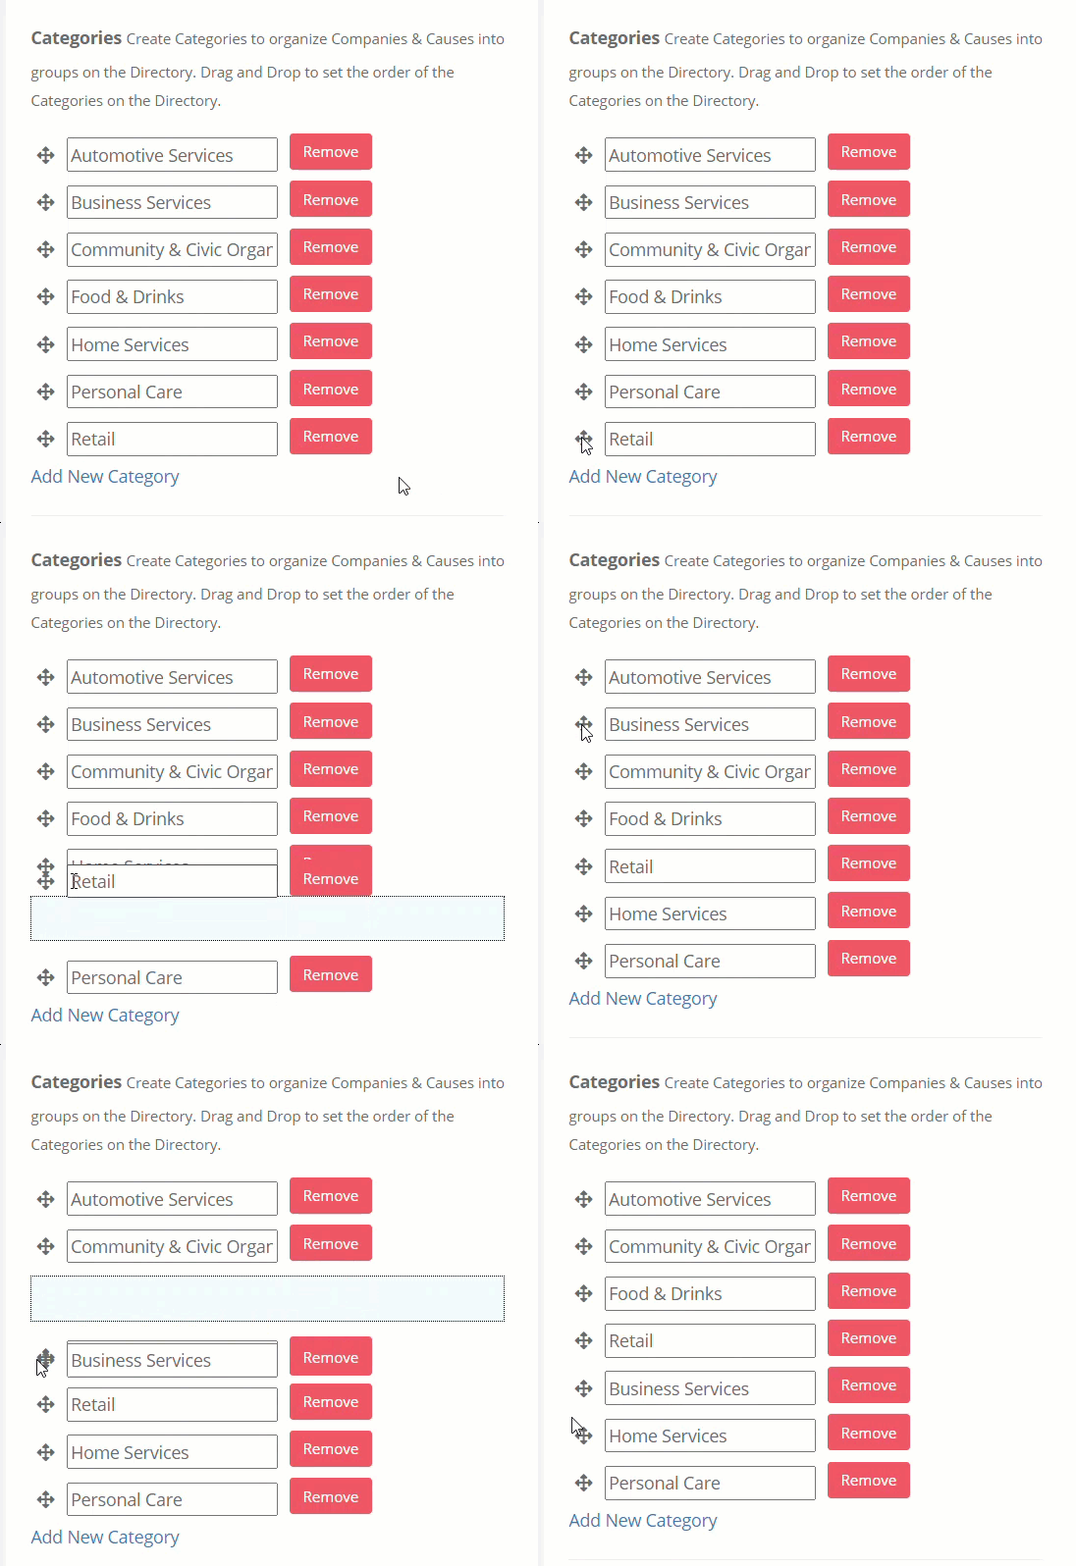
After creating your categories, you can adjust their display order in the directory. Simply click and drag the icon to the left of the category name to rearrange them as needed.

NOTE: Once you are done with the input and organizing of your Categories, be sure to scroll down and click Save Settings.
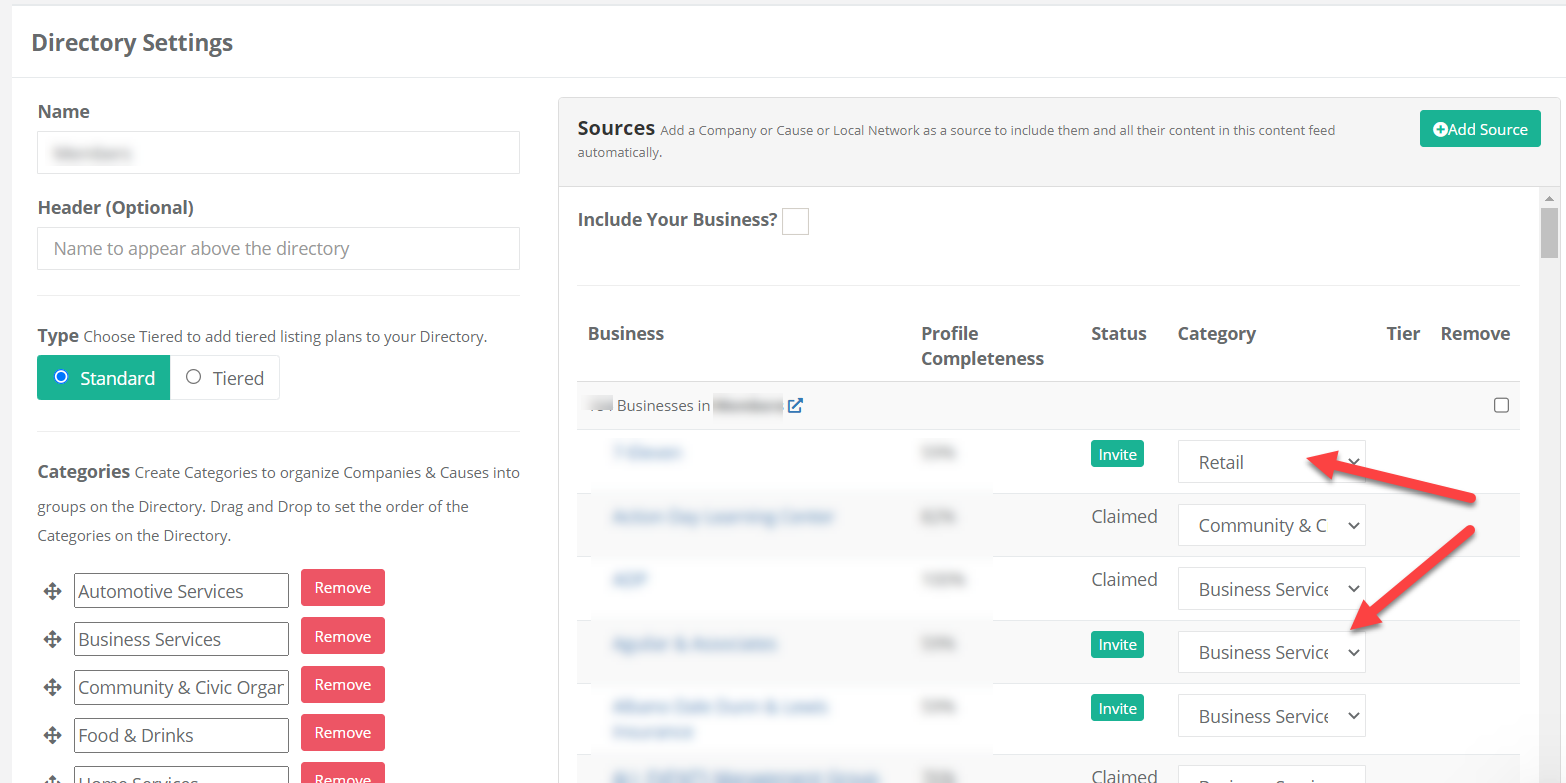
Once the updates are saved, you will need to assign a Category to each business included as a Source in the Directory.

NOTE: If a business is not assigned a category in your directory, it will default to a built-in 'Other' category, which will appear at the bottom of the directory on your website.
