- Help Center
- The Locable Publisher Platform
- Events and Calendars
-
The Locable Marketing Platform
- Getting Started with Your Locable Account
- Your Locable Business Profile
- Events & Calendars
- Blogging
- Express Email Newsletters
- Managing Your Website
- CRM (Managing and Organizing Companies & Contacts)
- Local Business Directories
- Member Management
- Sponsors
- Jobs & Volunteer Opportunities
- Offers
- Forms
- Customer Feedback & Reviews
- Online Storefront (Products, Menus, and Mercantile)
- Calls-to-Action (CTAs)
- Integrations
- Media Library - Images, Galleries, and PDFs
- Account Management
- Working with the Locable Team
-
The Locable Publisher Platform
- Getting Started
- Managing The Home Page
- Articles, Pages, and Photo Galleries
- Events and Calendars
- Directory Listings & Guides
- Banner Ads
- Community Sponsors
- Giveaways, Polls, and Readers Choice Contests
- Payments
- General Site Settings
- Sidebars, Modals, and Embeds
- Categories, Tags & Topics
- Menus & Navigation
- Media Library
- Managing Users & Logins
- Networks, Sections, Publications, and Neighborhoods
- Misc
-
Miscellaneous
Using Locations/Geotags
Available on the Locable Publishing Platform
It's important to create Geotags for your site. These are location-identifiers that can be used on events enabling visitors to filter to find what they're looking for.
Whether your publication spans one town or many adding identifiers for the neighborhoods, towns, or regions you serve adds value to your site visitors.
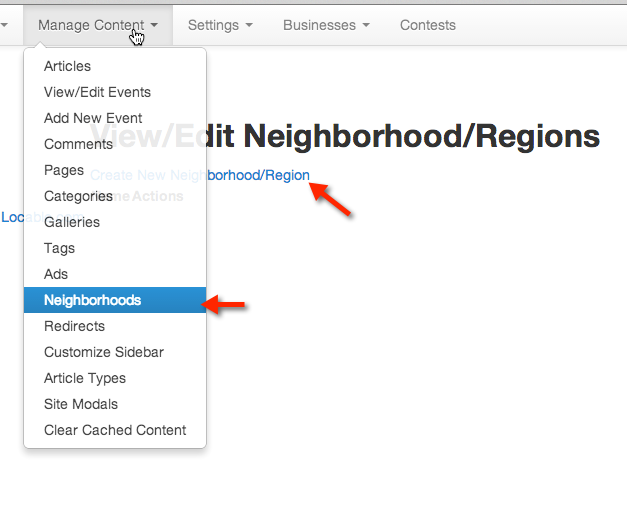
Setting up Geotags is easy, simply click Manage Content > Neighborhoods and then select the link Create New Neighborhood/Region and key in the names for the areas you'd like to include.

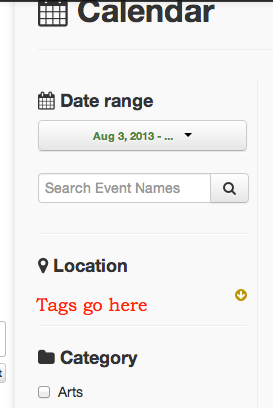
After you've added your Geotags they will appear on the Calendar and Directory and will be available to select when people are adding content.

