![Locable Logo 3a3a3a Gray.png]](https://help.locable.com/hs-fs/hubfs/Locable%20Logo%203a3a3a%20Gray.png?height=50&name=Locable%20Logo%203a3a3a%20Gray.png)
Available for the Build, Grow and Coordinate plans on the Locable Marketing Platform
When you're creating or editing a page in Locable, you might notice a small option in the top right corner labeled Advanced.
These settings are completely optional, but using them can help improve how your page looks and performs when it's shared online or appears in search results.
Clicking Advanced reveals the following options:
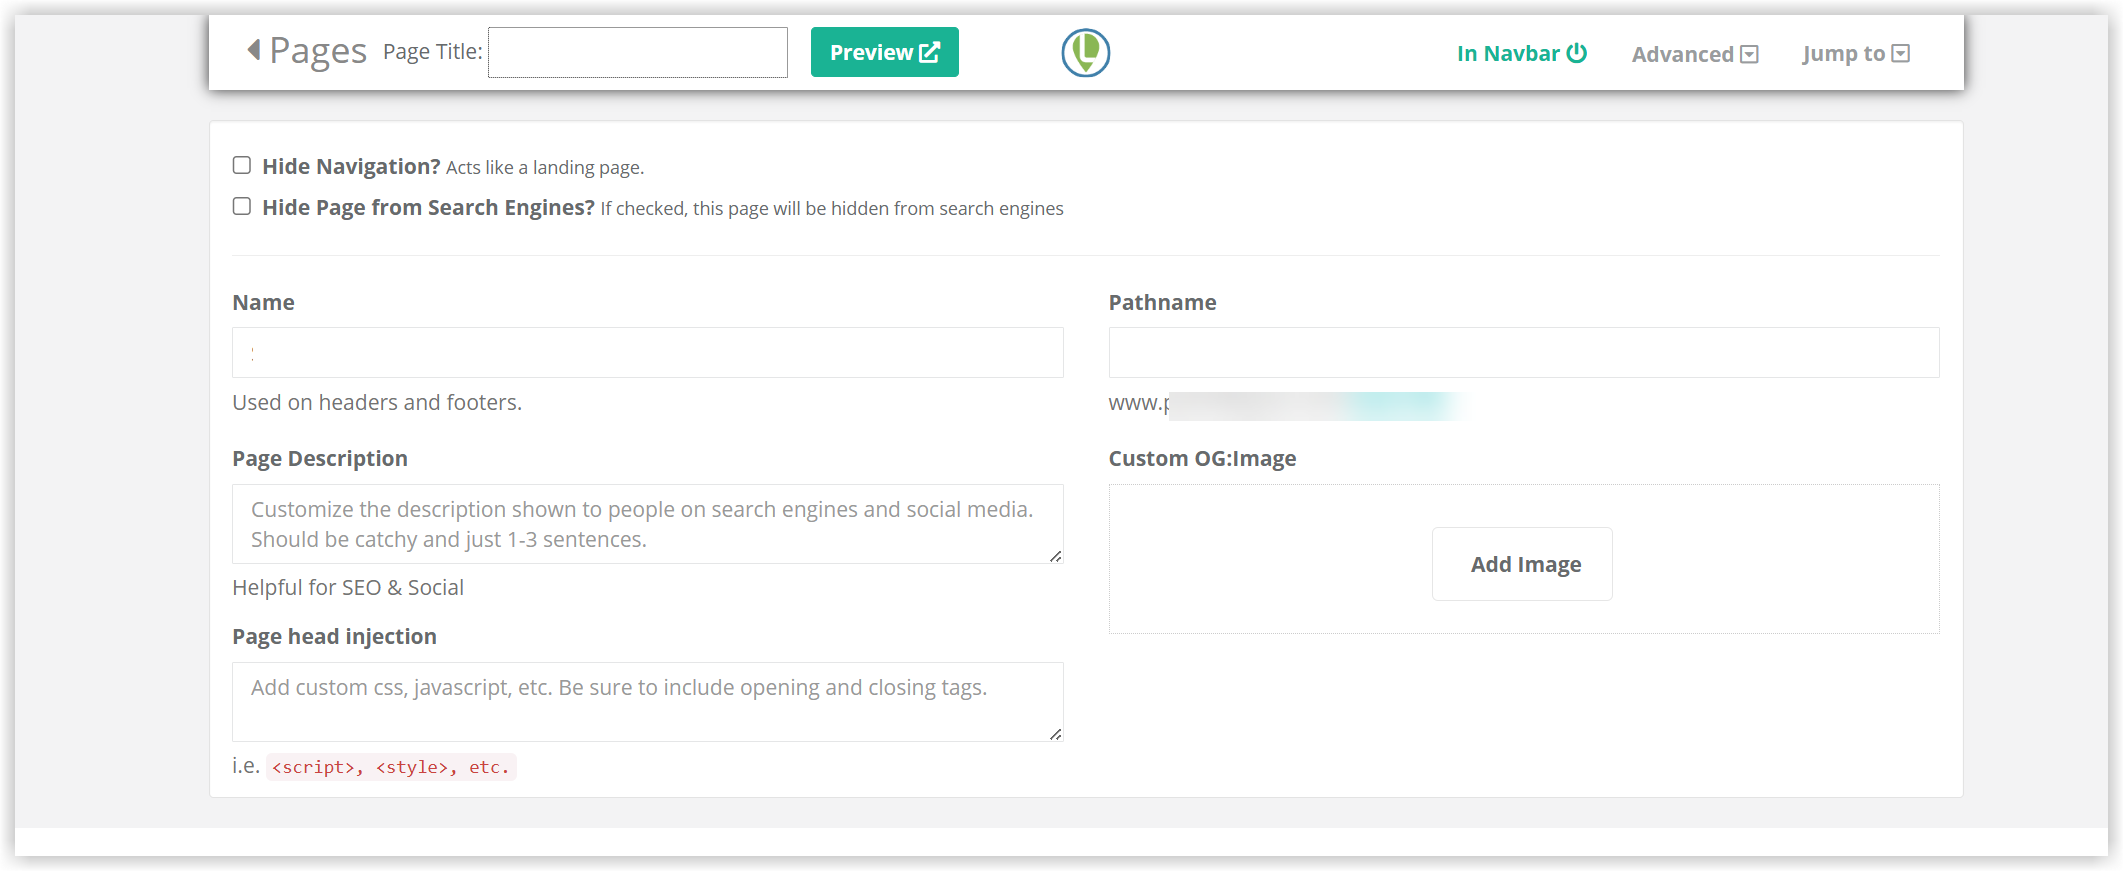
Page Name and Pathname
When you create a new page and enter a Page Title, the Name and Pathname fields will automatically fill in based on that title once you Save the changes to the page.
This helps speed up the setup process and ensures consistency across your site.
-
Name: Used internally to help you identify the page in your list of pages
-
Pathname: Becomes part of the page’s web address (URL)
You can edit either of these fields if needed, but in most cases, the default values will work just fine.
Advanced Settings
While optional, these settings can enhance how your page is displayed online and increase its effectiveness when shared or found in search engines.
Hide Navigation:
This setting lets you remove the site's navigation menu from the page.
-
Use this to create a standalone landing page—a page that focuses attention on a single action like:
-
Downloading a coupon
-
Signing up for a newsletter
-
Scheduling an appointment
-
Without the usual navigation links, there are fewer distractions, helping your visitors stay focused on the specific task you want them to complete.
Hide Page from Search Engines:
Checking this box prevents search engines like Google from indexing your page.
When to use it:
-
For thank you pages after a form is submitted
-
Temporary pages under construction
-
Internal pages not meant for public discovery via search
People can still view the page if they have the link—it’s just not searchable on Google or Bing.
Page Description:
This is a short text summary of your page that may appear in:
-
Google search results
-
Facebook or social media previews
-
Email previews
💡 Best Practices:
-
Keep it short and punchy—about 160 characters or less
-
Think of it like a movie trailer: tease the content without giving it all away
-
Make people curious so they’ll want to click and learn more
If you leave this blank, Google or social platforms may pull in the first line of your page’s content automatically—which might not be as compelling.
Page Head Injection (Custom Code)
This field is for adding custom code to this specific page only—it inserts code into the page’s <head> section.
Common uses:
-
Adding custom tracking scripts (e.g. for Facebook Pixel or Google Ads)
-
Applying page-specific CSS or JavaScript
-
Including verification codes (e.g. for third-party tools)
NOTE: This feature is for advanced users or developers. If you're unsure, check with your web manager or contact support before adding code.
Custom OG:Image (Open Graph Image):
This is the image that shows up when someone shares your page on social media, like Facebook.
- Why it matters: A strong, relevant image can make your post more eye-catching—and more likely to get clicked.
PRO TIPS:
-
Use a high-quality image, at least 1200 x 630 pixels
-
Choose something relevant and visually appealing that supports your message
If the wrong image shows up on Facebook:
Sometimes Facebook pulls an outdated or incorrect image. Here's how to fix it:
-
Visit Facebook's Debug Tool
-
Paste in your page URL
-
Click Debug, then click Rescrape
This tells Facebook to refresh what it knows about your page.
If you don’t set a custom image, Facebook and Google will choose one for you—often the first image on the page, which might not look great or represent your message well.
Why Use These Settings?
Adding a good meta description and a custom image can:
-
Improve how your content appears on social media
-
Help it show up better in search results
-
Encourage more people to click, visit, and engage with your page
👉 It takes less than a minute, and it can make a big difference.