![Locable Logo 3a3a3a Gray.png]](https://help.locable.com/hs-fs/hubfs/Locable%20Logo%203a3a3a%20Gray.png?height=50&name=Locable%20Logo%203a3a3a%20Gray.png)
Available for the Coordinate plans on the Locable Marketing Platform
Moderating events in a community calendar is essential for ensuring that the events listed are relevant, appropriate, and aligned with the calendar's purpose. This guide will walk you through the process of moderating events, giving you control over what appears on your community calendar.
Proper moderation helps maintain the calendar's integrity and enhances the user experience.
Calendar Moderation Settings
You can adjust your calendar's moderation settings by going to Embeddable Resources > Event Calendars and clicking Manage to open the calendar settings. You will see 3 options for moderation:
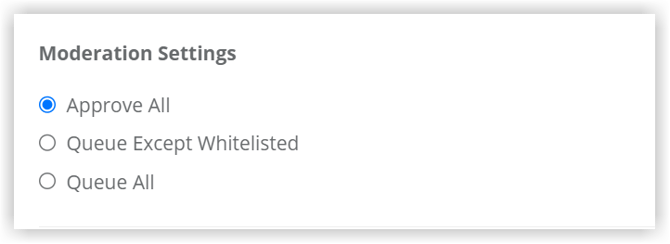
- Approve All means all sourced events will automatically appear in your calendar.
- Queue Except Whitelist means all sourced events will be pending your approval before appearing in your calendar. Click the 'Whitelist' checkbox for each business included in the Source list to auto-approve only their event posts.
- Queue All means no sourced events will appear on your calendar until you manually approve them.
Once you've made the appropriate selection, be sure to scroll down to save the changes to your calendar settings.
NOTE: When your calendar is set to Approve All events automatically, which we recommend, you can still remove select events from your calendar if you wish.
Approving or Declining Events
Once your moderation settings are defined, you can start reviewing events as they are posted by going to Activity Hub > Event Moderation.
Here you will see any events 'Pending' approval for all calendars.
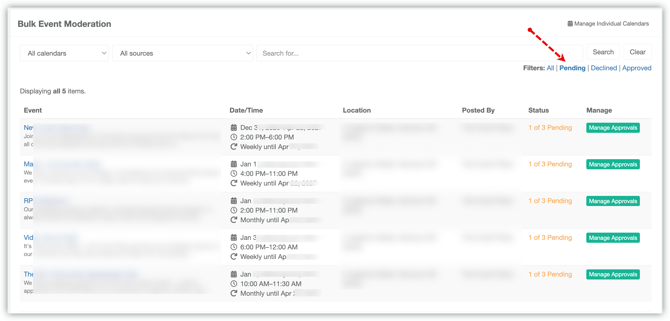
You can also view all sourced events by each calendar resource, each source (your Local Connections™ included in your calendars), or filter based on 'pending', 'declined' or 'approved' status.
To just moderate for a specific calendar you can go to Embeddable Resources > Event Calendars and click Manage to open the specific calendar settings. Here you will see any pending approval for this calendar, along with a short list of recently moderated events, in case you need to make a quick change:
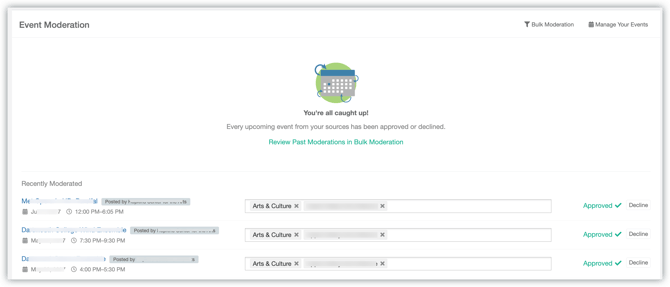
You will also see all recently moderated sourced events - events published by your Local Connections™ along with any categories assigned to those events.
Managing Approvals
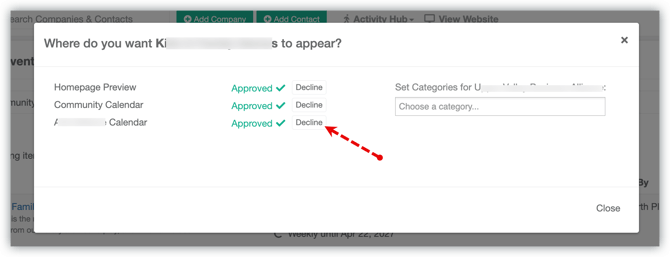
If you want to remove an approved event from your calendar, or add a previously declined event, simply click the Manage Approvals button next to the event:
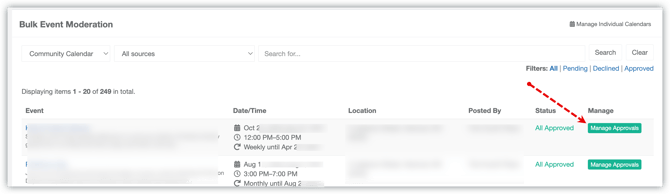
Then you can decline or approve for each calendar resource that event may appear in.
Assigning Event Categories
If you have event categories defined for your calendar, you can moderate and update which categories are assigned to any events appearing in your calendar.
Local Connections™ Can Choose from Your Categories
The companies you've included in your calendar feed have the option to self-select the most relevant category for their event from your list of available event categories once they publish their event.
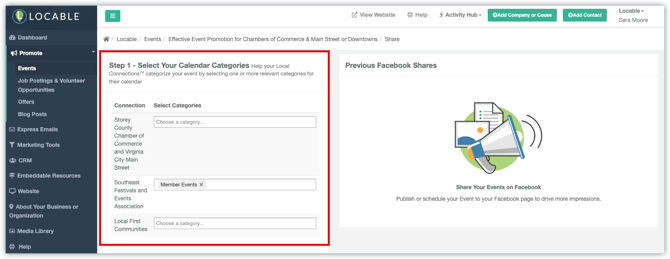
You can Assign Categories to Their Events
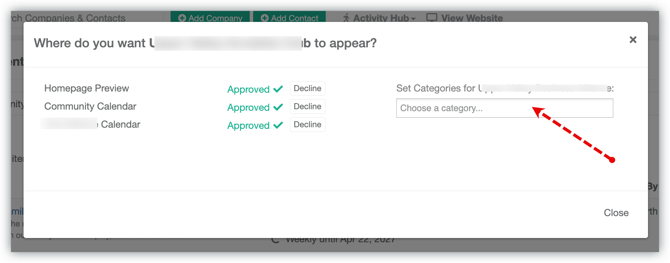
While viewing Event Moderation or while Managing Approvals, you can also set categories for the event if you are using event categories in your calendar.
To modify the category an event appears under, go to Event Moderation by navigating to Activity Hub > Event Moderation.
From here, you can click Manage Approvals to adjust the category settings for any event appearing on your calendars.
Calendar Moderation Settings
You also have the option to enable a geo-based moderation override to better control which events appear on your calendar. This is a calendar setting that allows you to automatically flag events submitted from outside your defined geographic area.
-
If enabled, events located more than 25 miles from your zip code can either be queued for moderation or automatically declined.
-
You can also adjust the moderation radius by clicking 'Edit Moderation Area'.