- Help Center
- The Locable Publisher Platform
- General Site Settings
-
The Locable Marketing Platform
- Getting Started with Your Locable Account
- Your Locable Business Profile
- Events & Calendars
- Blogging
- Express Email Newsletters
- Managing Your Website
- CRM (Managing and Organizing Companies & Contacts)
- Local Business Directories
- Member Management
- Sponsors
- Jobs & Volunteer Opportunities
- Offers
- Forms
- Customer Feedback & Reviews
- Online Storefront (Products, Menus, and Mercantile)
- Calls-to-Action (CTAs)
- Integrations
- Media Library - Images, Galleries, and PDFs
- Account Management
- Working with the Locable Team
-
The Locable Publisher Platform
- Getting Started
- Managing The Home Page
- Articles, Pages, and Photo Galleries
- Events and Calendars
- Directory Listings & Guides
- Banner Ads
- Community Sponsors
- Giveaways, Polls, and Readers Choice Contests
- Payments
- General Site Settings
- Sidebars, Modals, and Embeds
- Categories, Tags & Topics
- Menus & Navigation
- Media Library
- Managing Users & Logins
- Networks, Sections, Publications, and Neighborhoods
- Misc
-
Miscellaneous
How to Add a Header Image to the Directory Page, Calendar Page, and Offers Page
Available on the Locable Publishing Platform
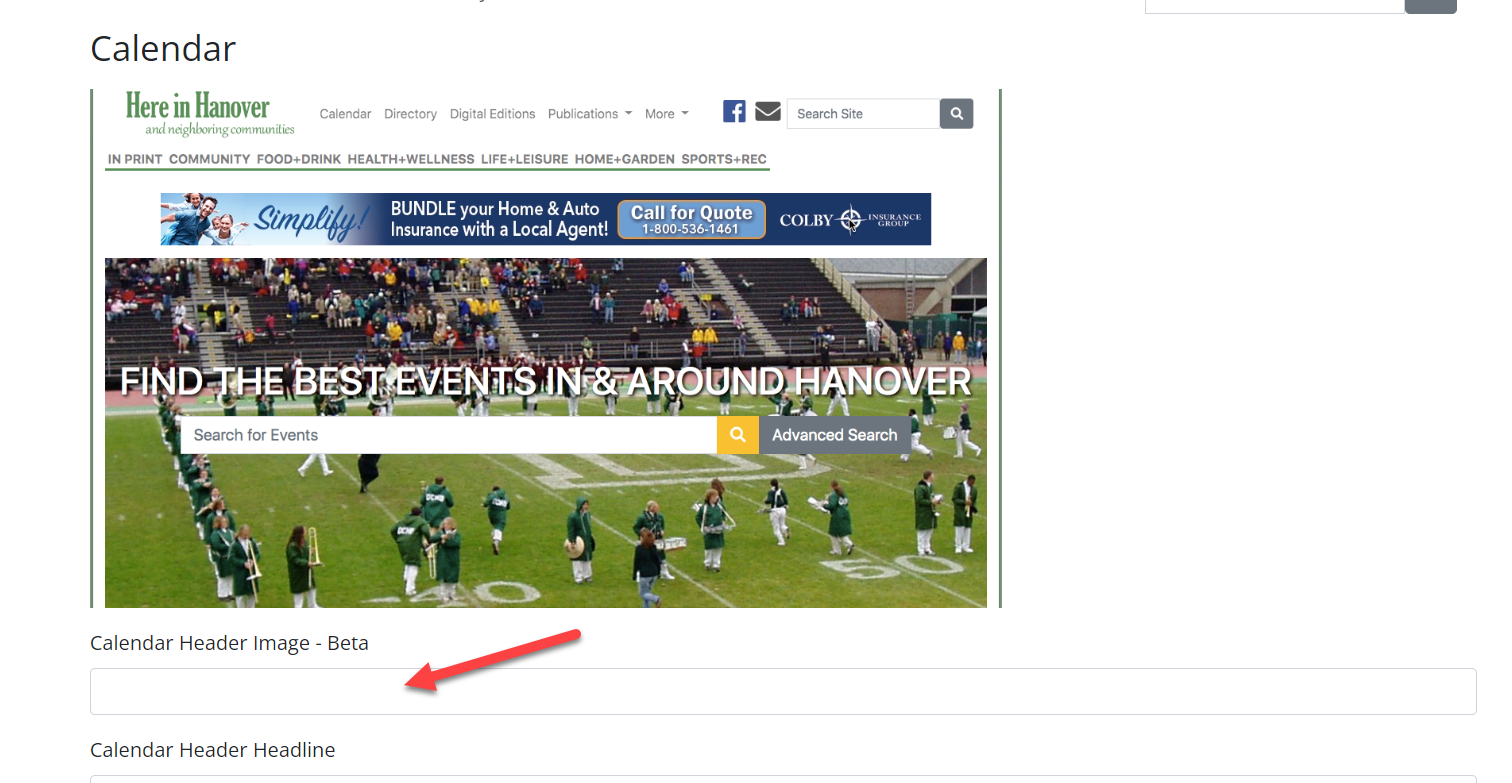
You can add an image to the search box for the Calendar page, the Directory page, and the Offers page. To do this you will need to go to Settings > General, and then click the Layouts tab.

You will need to first add the image to your Media Library, and then get the link for that image. You can do that by following these instructions:
- Upload the image - you can do this through the article UI or any other Media Library page
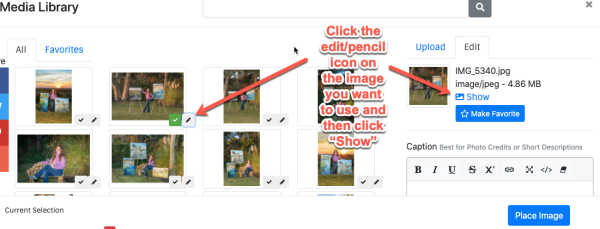
- Select the image and click the pencil icon next to it, then click the Show link to get the hosted URL and copy it

- Paste the hosted image URL in the Site Styles in the appropriate Header Image field in Settings > General under the Layouts tab and then scroll to the bottom and click 'Update Settings'
